Monday, October 31, 2005

Windows IR Word Metadata script

I recently came across some interesting articles on Harlan Carveys Incident Response Blog regarding retrieving metadata information from Word documents. He has several posts on the topic, listed below
In the last article, he provides an example Perl script to demonstrate retrieving various metadata information from Word documents. I thought this would be something interesting to check out.

Since I will be running this from a Windows environment, I will need a Perl interpreter. My preference for this is ActiveStates ActivePerl. This could also be done via the Cygwin Perl package. ActivePerl is available from here. There are two install packages, one is a graphical installer, and the other is a DOS batch installer. The only difference between the two as far as I can tell is that they create different folders under the Windows Start Menu. I will show both installers.

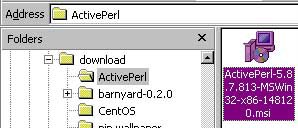
I will cover the graphical installer first, since it is the package used more often. I downloaded the ActiveState ActivePerl MSI package from their website. To run the installer I go to the location to which I downloaded it and double-click on the install file pictured below.


On the option screen, I select all options to be installed on the local hard drive, and set my install directory to C:\ActivePerl.


I keep all options on the next screen, and just click on next until it is complete.

To install with the AS package, I extract the ActivePerl archive file to C:\temp\ap_install. The package comes with a DOS batch file called installer.bat for doing the install. Below is my DOS session of the install process.

C:\TEMP\ap_install\ActivePerl-5.8.7.813-MSWin32-x86-148120>dir *.bat
Volume in drive C is Local Disk
Volume Serial Number is 7BC4-13DA

Directory of C:\TEMP\ap_install\ActivePerl-5.8.7.813-MSWin32-x86-148120

06/06/2005 02:19p 15,757 Installer.bat
1 File(s) 15,757 bytes
0 Dir(s) 2,704,973,312 bytes free

C:\TEMP\ap_install\ActivePerl-5.8.7.813-MSWin32-x86-148120>installer.bat
Welcome to ActivePerl.

This installer can install ActivePerl in any location of your choice.
You do not need Administrator privileges. However, please make sure
that you have write access to this location.

Enter top level directory for install [c:\Perl]: C:\ActivePerl

The typical ActivePerl software installation requires 80 megabytes.
Please make sure enough free space is available before continuing.

ActivePerl 813 will be installed into 'C:\ActivePerl'
Proceed? [y] y

If you have a development environment (e.g. Visual Studio) that you
wish to use with Perl, you should ensure that your environment (e.g.
%LIB% and %INCLUDE%) is set before installing, for example, by running
vcvars32.bat first.
Proceed? [y]

Create shortcuts to the HTML documentation? [y]

Add the Perl\bin directory to the PATH? [y]

Create Perl file extension association? [y]

Create IIS script mapping for Perl? [y] n

Create IIS script mapping for Perl ISAPI? [y] n

Copying files...
3002 File(s) copied
Finished copying files...
Relocating...done (95 files relocated)

Configuring C:\ActivePerl\lib\Config.pm for use in C:\ActivePerl...

Configuring Perl ...

Configuring PPM for use in C:\ActivePerl...

Setting 'tempdir' set to 'C:\DOCUME~1\jward\LOCALS~1\Temp'.

If you are behind a firewall, you may need to set the following
environment variables so that PPM will operate properly:

set HTTP_proxy=http://address:port [e.g. http://192.0.0.1:8080]
set HTTP_proxy_user=username
set HTTP_proxy_pass=password


Building HTML documentation, please wait...

Thank you for installing ActivePerl!

Press return to exit.

Note the line about setting up the HTTP proxy. If you are behind a firewall and are required to go through a proxy server, you will need to set this up. This is not noted in the graphical installation.

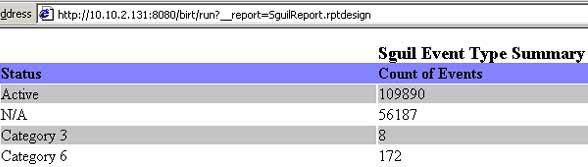
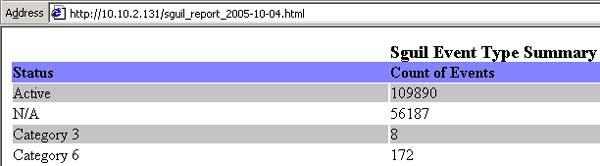
I downloaded Harlan’s script from here. The archive contains a single Perl script file titled wmd.pl. I extract the file to C:\ap_install. For testing, I will use the Word version of one of my previous articles, Sguil Reporting with Birt. I copy this file to C:\ap_install for simplicities sake. Eagerly I tried to run the script

c:\activeperl\bin\perl wmd.pl "Sguil reporting with BIRT3.doc”

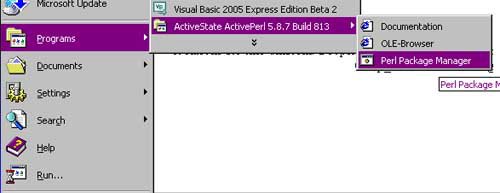
And I got garbage. I review Harlan’s blog entry, which clues me in on some additional steps I need to take. The script requires 3 packages from the Perl/Programmers Package Manager. I will need to run a series of commands from PPM to install these. The PPM is located as pictured below


Below is the session for trying to install the first package

ppm> install OLE-Storage
Error: No valid repositories:
Error: 500 Can't connect to ppm.ActiveState.com:80 (Bad hostname 'ppm.ActiveStat
e.com')
Error: 500 Can't connect to ppm.ActiveState.com:80 (Bad hostname 'ppm.ActiveStat
e.com')
ppm>

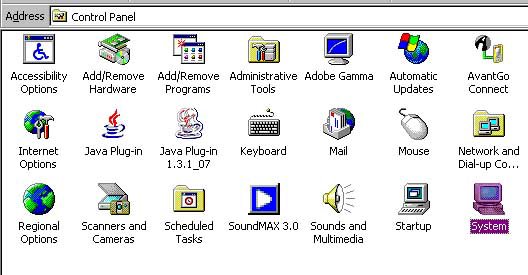
As mentioned before, I need to configure for proxy support. I have to configure an environment variable to point to my proxy. I do this from the Windows Control Panel. I go to settings, Control Panel, and double click on the System icon.


Once the System Properties Window comes up, I select the Advanced tab, then click on the Environment Variables button.


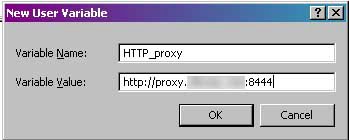
Once in the Environment Variables section, I create a new System Environment Variable by clicking on the New button


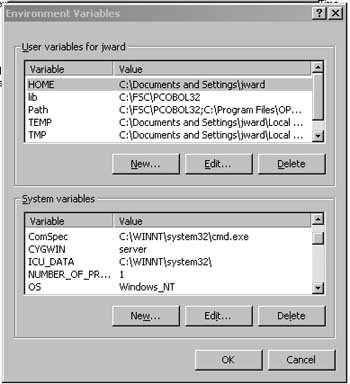
And I enter in my proxy info like so:


I exit out and rerun PPM so it can recognize the new environment variables. Below is my install session for the three additional packages (Note: I edited the results for brevity)

ppm> install OLE-Storage
====================
Install 'OLE-Storage' version 0.386 in ActivePerl 5.8.7.813.
====================
Downloaded 99928 bytes.
Extracting 40/40: blib/arch/auto/OLE/Storage/.exists
Installing C:\ActivePerl\html\bin\herbert.html
Installing C:\ActivePerl\html\bin\lclean.html
………..<edited>……………………
Successfully installed OLE-Storage version 0.386 in ActivePerl 5.8.7.813.
ppm> install Startup
====================
Install 'Startup' version 0.103 in ActivePerl 5.8.7.813.
====================
Downloaded 15618 bytes.
Extracting 9/9: blib/arch/auto/Startup/.exists
Installing C:\ActivePerl\html\bin\replace.html
………..<edited>……………………
Successfully installed Startup version 0.103 in ActivePerl 5.8.7.813.
ppm> install Unicode-Map
====================
Install 'Unicode-Map' version 0.112 in ActivePerl 5.8.7.813.
====================
Downloaded 449032 bytes.
Extracting 113/113: blib/arch/auto/Unicode/Map/Map.lib
………..<edited>……………………
Installing C:\ActivePerl\bin\mkmapfile.bat
Successfully installed Unicode-Map version 0.112 in ActivePerl 5.8.7.813.
ppm>exit

With the required packages installed, I again try Harlan’s script. (note: I prefix my command with perl this time to make sure I am running in the Perl environment).

C:\TEMP\ap_install>c:\activeperl\bin\perl wmd.pl "Sguil reporting with BIRT3.doc
"
--------------------
Statistics
--------------------
File = Sguil reporting with BIRT3.doc
Size = 507904 bytes
Magic = 0xa5ec (Word 8.0)
Version = 193
LangID = English (US)

Document has picture(s).

Document was created on Windows.

Magic Created : MS Word 97
Magic Revised : MS Word 97

--------------------
Last Author(s) Info
--------------------
1 : JWard : H:\Blog entries\REporting with BIRT\Sguil reporting with BIRT.doc
2 : JWard : H:\Blog entries\REporting with BIRT\Sguil reporting with BIRT.doc
3 : ***************: E:\Blog entries\REporting with BIRT\Sguil reporting
with BIRT.doc
4 : ***************: C:\Documents and Settings\Administrator\Application
Data\Microsoft\Word\AutoRecovery save of Sguil reporting with BIRT.asd
5 : Bonnie Taylor : C:\Documents and Settings\btaylor\Desktop\Sguil reporting wi
th BIRT.doc
6 : Bonnie Taylor : C:\Documents and Settings\btaylor\Application Data\Microsoft
\Word\AutoRecovery save of Sguil reporting with BIRT.asd
7 : Bonnie Taylor : C:\Documents and Settings\btaylor\Application Data\Microsoft
\Word\AutoRecovery save of Sguil reporting with BIRT.asd
8 : Bonnie Taylor : C:\Documents and Settings\btaylor\Application Data\Microsoft
\Word\AutoRecovery save of Sguil reporting with BIRT.asd
9 : Bonnie Taylor : C:\Documents and Settings\btaylor\Application Data\Microsoft
\Word\AutoRecovery save of Sguil reporting with BIRT.asd
10 : JWard : C:\Documents and Settings\jward\My Documents\Blog entries\REporting
with BIRT\Sguil reporting with BIRT3.doc

--------------------
Summary Information
--------------------
Title : Sguil is a great platform for IDS operations
Subject :
Authress : ***************
LastAuth : JWard
RevNum : 2
AppName : Microsoft Word 9.0
Created : 28.10.2005, 21:18:00
Last Saved : 28.10.2005, 21:18:00
Last Printed :

--------------------
Document Summary Information
--------------------
Organization : ***************

Success. The script is working correctly. I can gather a lot of information by looking at this. By looking at the history, I can see where I created the article under H:\Blog entries\ REporting with BIRT (which is on a USB Drive). I can then guess one of two things, a separate user with different drive mappings than Jward opened the document or it was opened on another machine. This is evident by entry 3 showing the document under E:\ Blog entries\REporting with BIRT\Sguil reporting with BIRT.doc, and I can tell the document was opened at least long enough for one auto-save to occur as indicated by entry 4. Bonnie Taylor, my good friend and editor, then opened the document (Where would I be without her?) from her Windows Desktop. Bonnie had the document open long enough for at least 4 auto-saves to occur showing me that she is actually reading the articles I send her :) . And the document was finally opened by Jward. The date created and last saved entries in the summary must be specific to the date that the document was actually created, since this document was restored from an email archive on this date, it was actually created on Sept. 28th, so this information would be suspect in an actual investigation.

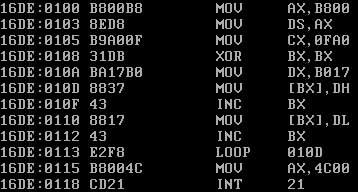
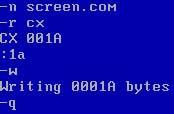
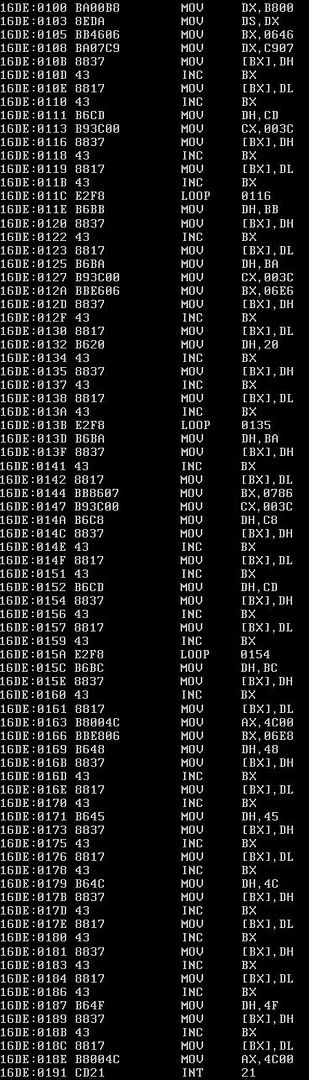
To check this script out further, I open the Word document for A Simple Program in Debug to further test the script:

C:\TEMP\ap_install>c:\activeperl\bin\perl wmd.pl "DOS Debug.doc"
--------------------
Statistics
--------------------
File = DOS Debug.doc
Size = 361472 bytes
Magic = 0xa5ec (Word 8.0)
Version = 193
LangID = English (US)

Document has picture(s).

Document was created on Windows.

Magic Created : MS Word 97
Magic Revised : MS Word 97

--------------------
Last Author(s) Info
--------------------
1 : JWard : C:\Documents and Settings\jward\My Documents\Blog entries\DEBUG\DOS
Debug.doc
2 : JWard : C:\Documents and Settings\jward\My Documents\Blog entries\DEBUG\DOS
Debug.doc
3 : JWard : C:\Documents and Settings\jward\My Documents\Blog entries\DEBUG\DOS
Debug.doc
4 : JWard : C:\Documents and Settings\jward\My Documents\Blog entries\DEBUG\DOS
Debug.doc
5 : JWard : C:\Documents and Settings\jward\My Documents\Blog entries\DEBUG\DOS
Debug.doc
6 : JWard : C:\Documents and Settings\jward\My Documents\Blog entries\DEBUG\DOS
Debug.doc
7 : JWard : C:\Documents and Settings\jward\Application Data\Microsoft\Word\Auto
Recovery save of DOS Debug.asd
8 : : E:\DEBUG\DOS Debug.doc
9 : : C:\Documents and Settings\digiassn\Application Data\Microsoft\Word\AutoR
ecovery save of DOS Debug.asd
10 : : C:\Documents and Settings\digiassn\Application Data\Microsoft\Word\Auto
Recovery save of DOS Debug.asd

--------------------
Summary Information
--------------------
Title : I got a little bored the other day and was feeling a little nosta
lgic for the days of DOS
Subject :
Authress : JWard
LastAuth :
RevNum : 63
AppName : Microsoft Word 9.0
Created : 12.10.2005, 15:06:00
Last Saved : 19.10.2005, 17:21:00
Last Printed :

--------------------
Document Summary Information
--------------------
Organization : ***********

Again, the same kind of information can be gathered by looking at the Last Authors Info. I can see Jward made numerous edits, however, only the edits at entry 6 was open long enough for the auto-save feature to save in entry 7. Entry 8 was opened by a blank user from another location (USB Key), and opened long enough for 2 auto-saves to occur. In this instance, the Created date and date last saved are both correct.

I am impressed with the output of the script. Harlan has proved one of the points I consistently try to make: many times people will downplay the usefulness of scripts because they are not compiled programs, or because they are not written in whatever the programming language of the month is. I disagree with this sentiment. While I try not to judge, I believe the utility provided by a script or a program, regardless of its base language, is a measure of its worth. Take Sguil for example. Sguil provides one of the best, if not the best, platforms for network security analysts to work from, and it is written in TCL/Tk. And I would say that Sguil is more than simply a script.

On a final note, I have to thank Harlan for his help with some small issues I had with running the script. The first document I tried was truncated from my USB key because I did not shut it down correctly when I copied the document. Since the document was corrupt, I was getting some strange errors from the script. Harlan was kind enough to work with me on finding a solution. I will keep ActivePerl around and try out some of the other scripts that Harlan has provided to the community.

Friday, October 28, 2005

Input Validation in ASP.Net

I was reading the SecureMe blog the other day (check out their hilarious avatars) and I came across a number of references to “input validation.” I concur with the assessment that failure to use proper input validations is the source of quite a few software flaws, and the number of Cross Site Scripting and SQL Injection vulnerabilities could be minimized if proper input validation were used. The author mentioned how ASP.Net makes input validation easier, so I will demonstrate how to do basic validation in ASP.Net using the Regular Expression Validation Component. For more information about using .Net validation components, refer to this MSDN Library Article. I also came across a short but interesting academic paper placing blame on the failure of the academic community to instill proper fundamentals in developers. I believe this to be true. Incidentally, Slashdot has an article about individuals who learn to program in Visual Studio not getting proper programming fundamentals.

Input Validation is the process of confirming that the input into an application is valid, and handling cases where the input is not valid. The textbook CS example is checking for type errors. For example, a prompt asking for an integer value and the user providing a text string such as a name would result in an invalid type error. There are other types of validation errors, such as the dreaded buffer overflow. Receiving input that is passed directly to a backend system like a database can lead to unexpected results and subsequently to a SQL Injection vulnerability. Web Applications provide a larger layer of complexity than traditional applications due to the separation of the client interface and the backend servers. For Web applications, input validation has to be done on the client side as well as the server side, and also ensure that the inputs sync to prevent client side modification in the absence of server side checking. This added complexity is one of the many reasons I detest using Web interfaces for applications unless absolutely necessary.

In this example I will build a simple C# ASP.Net page in Visual Studio .Net 2002 that will query the employee table of my local database for an employee record with a matching ID. Results will be put into a listbox. The Employee ID is 10 characters, and can only contain numeric characters. There are no alpha characters or special characters.

Before I start, I want to demonstrate the completed application without input validation. You can see where I used a specially crafted input string to return more than just the one employee (the string I used is “ or nm_emp_last like ‘Wa’ –”), in this case all employees whose last names start with “WA”. Had this been a authentication form, I could log in with invalid credentials, or just create havoc with the database.

Lets start building the application to include the validation from the ground up. I will start by going up to File, New, Project, and creating a new project as illustrated below.


I will create a form with a Label, a Textbox, a Listbox, and a Submit button just like in the picture to the below:


I will then add a Regular Expression Validation component. I have a love/hate relationship with regular expressions. I love how powerful regular expressions are, but I hate how difficult they are to read, especially for someone who is not familiar with them; and in my opinion they violate quite a few rules of proper programming techniques. So I will keep my regular expression simple and avoid using any fancy script-fu. The input validation component is indicated in red in the picture above.

I will change the text to read “Invalid Input”, and use the validation expression of \d{10}, which will allow only 10 numeric characters. See the picture below:


Under the ControlToValidate property, I select the txtEmployeeID control


I will add the code depicted below to the cmdSubmit_Click function. This code will create an ADO.Net connection to an Oracle database, query the database with our filled in value, and add all the results to the results listbox. Exception handling is omitted for brevity:

private void cmdSubmit_Click(object sender, System.EventArgs e)
{
     if (Page.IsValid)
     {
          //Local Variables for working with Oracle to retrieve my data.
          System.Data.OleDb.OleDbConnection oraConnect = new System.Data.OleDb.OleDbConnection();
          System.Data.OleDb.OleDbCommand oraCommand = new System.Data.OleDb.OleDbCommand();;
          System.Data.OleDb.OleDbParameter oraParam = new System.Data.OleDb.OleDbParameter("empId", System.Data.OleDb.OleDbType.VarChar, 10);
          System.Data.OleDb.OleDbDataReader oraResults;

          //Set the database connection string and open up the connection
          oraConnect.ConnectionString = "Provider=OraOLEDB.Oracle.1;Password=test1234;Persist Security Info=True;User ID=test;Data Source=test";
          oraConnect.Open();

          //Setup up the database command. First set the conneciton object for
          //the command, the set the command type to test. Then, set the query
          //for retrieving the employee from the database, finally, add the
          //parameter we will be using
          oraCommand.Connection = oraConnect;
          oraCommand.CommandType = CommandType.Text;
          oraCommand.CommandText = "select nm_emp_last ', ' nm_emp_first Name from employees where no_emp = ?";
          oraCommand.Parameters.Add(oraParam);

          //Set the parameters value then execute the query, closing the connection
          //behind it
          oraCommand.Parameters["EmpID"].Value = txtEmployeeID.Text;
          oraResults = oraCommand.ExecuteReader(CommandBehavior.CloseConnection);

          //Traverse through the results, adding to the listbox all matches
          while (oraResults.Read())
               lstResults.Items.Add(oraResults["Name"].ToString());

          //close the connections
          oraResults.Close();
          oraConnect.Close();

          Response.Write("<script>alert(\"SQL Command: " + oraCommand.CommandText + " \");</script>");
     }
     else
          Response.Write("<script>alert(\"Invalid input found, ignoring request\");</script>");
     }
}


The program is complete. I would like to test my Input Validation control, so I save and run the project. I can see that the value of txtEmployeeID is already filled in the Textbox, so I click cmdSubmit. Once I do, I can see that the Invalid Input message appears due to the alpha characters.


Is this a client side validation at this point, or a server side validation? In order to test this, I will capture a session in Ethereal to try and investigate if is being done client side or server side. Although I can get the WebUIValidaton.js file, I feel it is too much work to try and kludge through it, and instead I instead decide to test by saving the POST session and modifying the parameter for txtEmployeeID with something that should fail validation. In order to do this, I find the POST session header as indicated under the Info column, then I right mouse click on it and select Follow TCP Stream. I make sure that ASCII is selected as the format, and click on save as, and save the session as bypassValidation.txt. I then edit the saved text file, remove all the server response information, and modify the txtEmployeeID to read “’ or 1=1 --”, which if successful, will attempt to pull all data from the table. (Thanks to this site for the SQL Injection example. I put the link to the print version to spare you the advertising). The modified example is below.

POST /SearchForEmployees/WebForm1.aspx HTTP/1.1
Accept: image/gif, image/x-xbitmap, image/jpeg, image/pjpeg, application/vnd.ms-powerpoint, application/vnd.ms-excel, application/msword, */*
Referer: http://john/SearchForEmployees/WebForm1.aspx
Accept-Language: en-us
Content-Type: application/x-www-form-urlencoded
Accept-Encoding: gzip, deflate
User-Agent: Mozilla/4.0 (compatible; MSIE 5.01; Windows NT 5.0)
Host: john
Content-Length: 273
Connection: Keep-Alive
Cache-Control: no-cache
Cookie: ASP.NET_SessionId=gmyrcwf1hhw0porjguqsnqeo

__VIEWSTATE=dDwxOTg4MTczMDcyO3Q8O2w8aTwxPjs%2BO2w8dDw7bDxpPDQ%2BOz47bDx0PHQ8O3A8bDxpPDE%2BO2k8Mj47PjtsPHA8V2FyZCwgSm9objtXYXJkLCBKb2huPjtwPFdhcmQsIEpvaG47V2FyZCwgSm9obj47Pj47Pjs7Pjs%2BPjs%2BPjs%2BJlE8BGSK6UaTCuPYd%2Bdr1fm5whg%3D&txtEmployeeID=' or 1=1 --&cmdSubmit=cmdSubmit

What I am going to do is connect to the Web server via Netcat and pipe in the above text file. Below is the DOS session for that attempt

C:\tmp>type bypassValidation.txt c:\nc localhost 80
HTTP/1.1 100 Continue
Server: Microsoft-IIS/5.0
Date: Thu, 27 Oct 2005 20:50:59 GMT
X-Powered-By: ASP.NET

HTTP/1.1 200 OK
Server: Microsoft-IIS/5.0
Date: Thu, 27 Oct 2005 20:50:59 GMT
X-Powered-By: ASP.NET
Connection: close
X-AspNet-Version: 1.1.4322
Cache-Control: private
Content-Type: text/html; charset=utf-8
Content-Length: 3100

<script>alert("Invalid input found, ignoring request");</script>
<!DOCTYPE HTML PUBLIC "-//W3C//DTD HTML 4.0 Transitional//EN" >
<HTML>
<HEAD>
<title>WebForm1</title>
<meta content="Microsoft Visual Studio 7.0" name="GENERATOR">
<meta content="C#" name="CODE_LANGUAGE">
<meta content="JavaScript" name="vs_defaultClientScript">
<meta content="http://schemas.microsoft.com/intellisense/ie5" na
me="vs_targetSchema">
</HEAD>
<body MS_POSITIONING="GridLayout">
<form name="Form1" method="post" action="WebForm1.aspx" language
="javascript" onsubmit="if (!ValidatorOnSubmit()) return false;" id="Form1">
<input type="hidden" name="__VIEWSTATE" value="dDwxOTg4MTczMDcyO3Q8O2w8aTwxPjs+O
2w8dDw7bDxpPDQ+Oz47bDx0PHQ8O3A8bDxpPDE+O2k8Mj47PjtsPHA8V2FyZCwgSm9objtXYXJkLCBKb
2huPjtwPFdhcmQsIEpvaG47V2FyZCwgSm9obj47Pj47Pjs7Pjs+Pjs+Pjs+JlE8BGSK6UaTCuPYd+dr1
fm5whg=" />

<script language="javascript" src="/aspnet_client/system_web/1_1_4322/WebUIValid
ation.js"></script>


<span id="Label1" style="Z-INDEX: 101; LEFT: 17px; POSIT
ION: absolute; TOP: 16px">Enter the Employee ID:</span><input name="txtEmployeeI
D" type="text" value="' or 1=1 --" id="txtEmployeeID" style="Z-INDEX: 102; LEFT:
165px; POSITION: absolute; TOP: 17px" /><input type="submit" name="cmdSubmit" v
alue="cmdSubmit" onclick="if (typeof(Page_ClientValidate) == 'function') Page_Cl
ientValidate(); " language="javascript" id="cmdSubmit" style="Z-INDEX: 103; LEFT
: 21px; POSITION: absolute; TOP: 51px" /><select name="lstResults" size="4" id="
lstResults" style="height:75px;width:325px;Z-INDEX: 104; LEFT: 345px; POSITION:
absolute; TOP: 16px">
<option value="lstResults">lstResults</option>
<option value="Ward, John">Ward, John</option>

</select>
<span id="RegularExpressionValidator1" controltovalidate
="txtEmployeeID" errormessage="Invalid Input" isvalid="False" evaluationfunction
="RegularExpressionValidatorEvaluateIsValid" validationexpression="\d{10}" style
="color:Red;Z-INDEX: 105; LEFT: 165px; POSITION: absolute; TOP: 47px">Invalid In
put</span>
<script language="javascript">
<!--
var Page_Validators = new Array(document.all["RegularExpressionValidato
r1"]);
// -->
</script>


<script language="javascript">
<!--
var Page_ValidationActive = false;
if (typeof(clientInformation) != "undefined" && clientInformation.appName.indexO
f("Explorer") != -1) {
if (typeof(Page_ValidationVer) == "undefined")
alert("Unable to find script library '/aspnet_client/system_web/1_1_4322
/WebUIValidation.js'. Try placing this file manually, or reinstall by running 'a
spnet_regiis -c'.");
else if (Page_ValidationVer != "125")
alert("This page uses an incorrect version of WebUIValidation.js. The pa
ge expects version 125. The script library is " + Page_ValidationVer + ".");
else
ValidatorOnLoad();
}

function ValidatorOnSubmit() {
if (Page_ValidationActive) {
return ValidatorCommonOnSubmit();
}
return true;
}
// -->
</script>


</form>
</body>
</HTML>

I can see that the script command to alert that an invalid input occurred is there, highlighted in red. I redirect the output to a file and open in IE.

By the pop-up message that was returned, I can tell that the processing is done server-side and the error message is returned to the client via the resulting HTML page. This is good because it helps to prevent an outsider from manipulating the client page to circumvent my validation routine. Had this been done client side, I would still have the alert message with the SQL that I used for debugging. While there are more in-depth tests, I am fairly confident that the Regular Expression Validation control is working. However, if you are rolling out an application, you should never assume that you are completely secure. Remember that there is always someone out there smarter than you. In time someone is bound to find a flaw in the .Net validation components, but these components are a good start toward securing your web applications from input validation attacks if you are using the .Net platform.

Thursday, October 27, 2005

Birt updates from the Birtworld Site

I was jut reading on the BirtWorld blog, which is written by two employees from Actuate, that they are in the process of revamping the examples section of the Birt website. I have written about Birt previously on this site, and given examples of reports and how to deploy them. So far I am impressed with Birts offerings, and am very pleased with Actuates commitment to the project. Also, congratulations to the Birt team for their recent article on TechForge regarding using Birt with Hibernate. It is good to see Birt getting some press. I believe Birt is a powerful project and has the potential to really open eyes towards FOSS as an alternative desktop platform. This article is the first time I have heard of Jason Weathersby refered to as the Birt evangelist. The only other time I have ever heard of someone refered to as an evangelist is Terry Quantrani for Rational Rose, so I will be sure to give him a hard time next time I talk to him.

Wednesday, October 26, 2005

HackQuest and TopCoder

     There are times when I get tired of the same old video games and I want a real challenge. I like challenges that make me use some actual skills to accomplish goals rather than playing a video game where you run around and shoot people. To me it’s more rewarding to complete a real world task, such as crack this file, or write a program, as well as educational. Fortunately there are two web sites that have just these sorts of games, HackQuest and TopCoder.

     HackQuest (http://www.hackquest.de) is a site with challenges that will introduce you to a number of computing concepts. There are different categories, and the idea is to break something in each of the categories, get the secret code, and input the code to confirm that you successfully completed the challenge. My favorites are in the cracking category, where you get an executable and have to crack with using a debugger to get the secret code. There are also programming related problems, problems relating to the Internet (“From Russia with Love” drove me nuts until it just came to me one day how to solve it doing something I do everyday, I wrote an article about the method I used), Steganography, Java Reverse Engineering, JavaScript debugging, and Logic problems. It’s a fun and educational site, and it provides a non-destructive way to test your skills. There are numerous ways to solve the challenges on this site, so it allows quite a bit of creativity. For example, when reading the forums for one of the programming solutions I had solved, a lot of the people had indicated writing programs in Java, Visual Basic, and C. I solved the same problem with a lot of piping in Bash. Its nice to be able to try out some of the more gray area skills without actually breaking any laws. Plus, the challenges force you to do research on real world issues such as SQL Injections, writing secure code, and reverse engineering.

     Topcoder is a little more practical than HackQuest. Topcoder is a site dedicated to programming. On Topcoder, you compete against other programmers in competitions hosted by large companies. Previous hosts include the NSA, Citigroup, and Sun Microsystems. There is plenty of practice problems based on previous competitions to get you familiar with the environment you compete in. There are also projects that the site hosts to build re-useable components that you can be rewarded with cash. It supports a number of languages, such as C++, C#, and Java. I personally don’t care for the competitions; I just prefer to go through the practice problems for educational purposes. However, it is fun to watch the lobbies to see the interactions between the hosting companies and the participants. When in the practice sessions, you can view other submissions to get an idea of different approaches to solving problems, and get an idea how the problem could be solved in other languages. I have learned quite a few new algorithms this way. The site does have some drawbacks. The scoring system is highly questionable and does not promote good programming practices. Some of the highest scoring code is also some of the ugliest code I have ever seen. In some instances the sloppiest code I have written scores higher than some of the cleaner code. When browsing other submissions, it seems to be more of an obfuscated competition than a professional programming competition. The automated scoring system also detracts points for commenting, which I don’t agree with. But I look past these flaws and still have a lot of fun on the site.

Monday, October 24, 2005

Ars-Technica article about Monad/MSH

Ars-Technica has a fairly in depth article about Microsofts new Command Line interface, MSH. After reading the articles I was very impressed. This is a much needed improvement for Windows. One of the strengths of *nix over Windows has always been its strong scripting support. This looks like a step in the right direction for Microsoft. Although my already existing script library is pretty huge and I won’t be migrating any old scripts over from Cygwin/Bash, if this lives up to the hype I may be writing all my future scripts in MSH. The Object Oriented nature seemed a little strange at first, but after reading the article it seems like it would be fairly intuitive, given that you understand the object model. Despite some of the criticism I read about it on Slashdot and OSNews, I am actually looking forward to it. I would have liked to have taken this for a spin myself and taken a few of my already existing scripts to see how I could implement this using Monad/MSH, however Microsofts Beta Site appears to be by invite only, and I am not on their list. If anyone knows how I can get a copy of this, I would appreciate it.

Friday, October 21, 2005

Nine Inch Nails in Houston, The Astros go to the Series, October 19th, 2005

I previously wrote about the Nine Inch Nails Concert in San Antonio, TX. When I left that concert I though I couldn’t possibly top it. I am glad I was wrong about that. And let me tell you, Wed. October 19th was a hell of a night to be in Houston, TX.

     We started out with the intention of just seeing the concert. Little did we know that the night of the concert was also the night that the Houston Astros went to the World Series, and that led to a great night to be in Houston.

     First, the concert. Leaving San Antonio took a bit longer than expected. Plus, I got an unexpected third passenger, which actually worked out since we could use the High Occupancy Vehicle lane and bypass traffic in our misadventures across Houston. We arrived in Houston after a two and a half hour drive from San Antonio at roughly six o’clock. This left us an hour and a half to get downtown to meet up with a friend who was kind enough to be our host for the duration of the stay. After meeting up with him, we had to get a hold of another friend since she was going to sell us her ticket. Unfortunately for us, her car had broken down and it had taken her a while to get back to her house. To make matters worse, she hit traffic. So we went back to our friend’s apartment to await news. At about seven thirty she arrived at her house, forwarded us her E-Ticket and we were about ready to go. That’s when we find out that our host does not have a printer at his house, so we will need to travel back to his office to print out the ticket. So a short ride later, we get to his office, print out the ticket, and we head to the Toyota Center. It was actually pretty impressive navigating through downtown Houston and getting to watch the beginning of the Astros game projected on the side of buildings. With all the anticipation of a win and the festivities planned for downtown, we actually managed to get really good parking a few blocks from the Toyota Center. A quick walk, a talk with a scalper to score a ten-dollar floor ticket for our additional passenger (I don’t know, I don’t want to know) and we are inside and ready to go.

     We missed the opening band and arrived just in time for Queens of the Stone Age to start playing. However, there was a large portion of the crowd glued to the TV sets in the halls watching the game, so getting drinks was a bit of a task. Once we got the drinks and headed down to the floor, I was relieved to hear that the sound problems QOTSA encountered in San Antonio had been corrected for this concert. The set was pretty much the same as the previous concerts, but it was great to watch them without having the high end on the sound blow my eardrums out.

     Between QOTSA and Nine Inch Nails I had a moment to converse with some of the stage crew and get a few details on some of their equipment. First thing I asked about was the enormous projector that they used. To me it looked like a huge oil projector, similar to the kind Pink Floyd used to use, and Roger Waters used on his 2002 tour. Turns out it was actually a Barco video projector (I believe it was the RLM G5i, but feel free to correct me if I am wrong) they used to project video on to sharks tooth scrim for the video images during Right Where it Belongs and Beside You in Time. The also had some video set pieces that I believe were LED video screens that displayed various effects footage on The Line Begins to Blur, Closer, and various other songs. Although I couldn’t talk with the lighting guy, it was pretty obvious that the lighting system they used was form the Whole Hog line from the former Flying Pig Systems, now a part of High End Systems. If I had to guess, I would say they were either Hog III’s or the iPC hog, since they didn’t have the old fashion look of the Whole Hog 500 or 1000. As far as the lighting heads they used, they looked like Studio Spots, but then again, to me all moving headlights look alike these days. They had a whole lot of other effects that I couldn’t even identify. Visually, this tour is pretty damned impressive.

     Nails put on a great show for Houston. The energy was there for the band. The songs sounded great. However, the crowd did not have the energy that San Antonio did. I think the Astros distracted a good majority of them. Anytime I went into the bathroom, someone would run in and give a score update. When I was on the floor, I could see people running up to the TV, running down and telling the floor security the score, and then they would split to update various other people on the score. When they game was over, there was a strange unexpected cheer in the middle of one of the bands sets by the interested parties. Although most people were actually focused on the concert, I did find it a little strange that there was so much split attention. The set list was pretty much the same, which was not the case with other concerts on the tour from other sites I have read. Fortunately for us, these shows have worked out the kinks in those previous shows, although I would have liked to have heard some of the songs excluded from the early play lists.

     After the concert we walked into a madhouse downtown. From the cities reaction, you would have through the Astros won the World Series. With all the people running around downtown screaming, cars honking, and people cheering, it just added to the natural high we all felt walking out of a Nine Inch Nails concert. Although stinking and sweaty from the two-hour musical onslaught we just endured, we went and hit up a few local bars and joined in the festivities. The atmosphere of Houston that night reminded me of Boston for some odd reason. And despite all the energy and drunkenness, we didn’t have a single problem, although I did get a little friendly badgering from the locals about my boys from S.A. Although I highly disagree with their predicted outcome, we did agree about the Astros.

     After hoping around for a while, we made out way back towards my buddies place around the W. Gray area of downtown and in this area there are some great restaurants. We got to eat at a really good 24 hour Greek restaurant called Bibas. The food here was excellent, and the service was definitely good. In the morning we ate at a place called West Gray Café and Grill, and let me tell you, if your there on Thursdays, I highly recommend the Turkey and Stuffing plate.

     For a single night stay in Houston, I had a blast. Great concert, nice ambiance, good food, and great people. All I have to say is Thanks Houston for being the highlight on my week off, and go Astros.

On a side note, I did get a chance to strike up some good conversations with my friends while I was there. We talked about some really interesting things such as alternative fuel sources such as Biodiesel and Alcohol, alternative housing sources such as Geodesic Domes and converting certain types of large frame steel sheds (they know someone who did this, I have yet to see it with my own eyes), and interesting server technologies. I will cover these when I do some more research on them.
     

Wednesday, October 19, 2005

A simple program in DEBUG

Years ago when I was still pursuing a track in electrical engineering, I had to take a course on Microprocessor design. One of the portions of this course dealt with assembly programming. I was feeling a little nostalgic, so I loaded up a copy of DOS 6.22 so I could play around with the DEBUG tool again. DEBUG was one of the coolest utilities in DOS. It was the little tool that was used to write COM files, the predecessor to EXE files. It was about as low level as you could get without actually coding in Hex or Binary. Although DEBUG still comes with Windows, although its just not the same. Windows severely limits your access to hardware and memory locations. In this article I will go back to the good old days and write the old fashion Hello World program with DEBUG. I have always believed that programmers who understand the internals of the platform that they develop on are more effective programmers. In my opinion, there really is no better way to get to know the X86 internals than to get your hands dirty with some assembly.

I apologize beforehand about the heavy use of screenshots, I did not load the network drivers for DOS, nor am I even sure there are any that will work with VMWare. So rather than double up on the typing, I captured the screens as I typed them. If you are not familiar with Assembly or the 8086 Instruction set, I would recommend doing a little background reading since a full tutorial is outside of the scope of this article. http://www.xs4all.nl/~smit/asm01001.htm has a brief overview, and you can do a search for “The Art of Assembly”. There are numerous books on the subject as well.

Here are the details on the program I will write. The program will have a blue background, with a small white border with black background with the word Hello in white. I will not use any of the DOS interrupts to output text, with the exception of the DOS exit program interrupt (AX set to 4c00 and calling Interrupt 21h), so I will be writing directly to memory.

For reference in this article, the base memory address for the video memory is at B800:0.

The steps for this program are as follows. I will set the background to a spotted box using the ASCII code for a lightly shaded box, then draw the box, then put the text into the box. For reference, the ASCII code for the shaded box is 176 (Hex B0), and the color byte will be set to 18. The ASCII codes for drawing the box are as follows:

DEC – HEX – What does this code do?
205 - CD - Horizontal Lines
200 - C8 - Bottom Left Corner
201 - C9 - Top Left Corner
188 - BC - Bottom Right Corner
187 - BB - Top Right Corner
186 - BA - Vertical Lines

And of course, the ASCII codes for the word HELLO. For both the text and the border, the color byte will be set to 07, which is a black background and white foreground. The program will be split into two programs and merged. The first program, screen.com, will draw the background. The second program, screen2.com, will draw the box and the text. I did this to split the tasks up and to save myself some sanity while writing this.

Lets start. From the MS-DOS prompt, type debug.


Once inside of debug, I type in the A then enter and this will put me into the assembler. I type in the below program:


I will go through each section and explain what it is doing. On the left hand side displays the location of each instruction. Next to that is the encoded instruction that the CPU actually processes. On the right are the instructions and registers, memory locations, and literals we are working with. All literals and memory locations are done in HEX. So starting from the first line:

mov ax, b800
mov ds, ax

Here I am moving the memory address of video memory into general purpose register AX. Then I move that value into the data segment register. The reason I take the extra step of moving into register AX then move into DS is because I cannot move a value directly into the data segment register. I can only move data from one of the 4 general-purpose registers, AX, BX, CX, or DX, into one of the segment registers. The next portion is:

mov cx, 0fa0
xor bx, bx
mov dx, b017

Here I am preparing my registers for my loop to set the memory to the correct characters and color codes. The first line is setting CX to the number of memory locations I will need to set, which is 80x25x2, or 4000 (FA0 in HEX). The reason I multiply this by two is because video memory stores characters in two byte combinations, the ASCII code of whatever character, then the attribute byte. Next, I clear my base register BX. XOR two registers together is the standard way to do this, but using the MOV instruction with a value of 0 will work just as well. BX will be used as an offset from the memory location stored in DS. I move the two-byte combination of the background ASCII code and its color attribute byte into register DX. The next sections is:

:010D mov [bx], dh
inc bx
mov [bx], dl
inc bx
loop 10D

I included the address of the start of my loop in the above code as a reference. Most Assemblers are nice enough to allow labels for jumps and loops, however debug is not. What I am doing on the first line here is moving the ASCII value into the proper memory address pointed to by the DS:BX combination. Next I increment BX to move one byte up. Then I move the attribute byte into the new location. The reason I do this one byte at a time is due to some issues with moving the whole DX register at once. I will not go into details about it, suffice to say logically it is easier to understand moving the two bytes separately. After that, I loop back to the start location at 010Dh. The Loop instruction will automatically decrement the value in the CX register by 1. Once the CX register is 0, it will continue on with the next segment of code. Once the loop is complete, I am ready to exit the program with the following code:

mov AX, 4C00
int 21

This will exit the program. Hit enter one extra time to exit the assembler and go back to debug. Looking at the above screenshot of the completed code, I can see that this program ends at 11A, which means it is 1A, or 26 in decimal, bytes big so far. I want to write this to disk and give it a try. I type in the following commands to do so:


Now I can type screen at the DOS prompt to see the results.


The above is just a small snippet of the screen. I am ready to type in the second portion of the program, the part that draws the box and writes HELLO inside. I will need to reference the ASCII codes mentioned earlier here for drawing my box. I want my box to start roughly in the middle of the screen and across. After doing some math, I find my memory offset at 1600 decimal, or 640 hex, and add 6 to that to move over just a tad. Now that I have what I need, I create a new file (just for testing). This new program will draw my box with the text HELLO in it. I type in the following code:

Image hosted by Photobucket.com

Once I am done typing, I set up debug to save my file using the file size of 93h:


Now I run the screen2.com file to see what it looks like:


I am lazy so I do not want to have to retype all that to combine the two files. So I will do append the files together to create my final output. First thing I need to do is go into screen.com, and modify it so that I am not making my call to exit. To do this, I type:

debug screen.com

Once inside of debug, I type U to see the contents of the file:


I look for the instructions just before my DOS exit code. I can see that this is at 115. So I type in r cx. I enter in 115.


Once done, I type w then enter to save my file.

I quit out of debug and now I am ready to join my files. To do this I type the following command:
type screen2.com >> screen.com

And that’s it. The two files are now joined. Below is a screenshot of the final results.


It’s amazing what 168 bytes can accomplish. Although there are numerous ways I could have accomplished this same task, such as keeping the text string in memory and doing a simple loop and byte copy, I chose to do it manually to illustrate how much work goes into something as simple as outputting text to the screen. We can see just how easy we have it with high-level languages. I plan on doing future articles with some hardware interactions to kind of pick up on some of my old electronics hobbies.

Monday, October 17, 2005

Nine Inch Nails Concert - San Antonio, Tx

I’ve written quite a few technical articles, so I figured this article I would let loose and write an article on a more personal level. Last night I had the opportunity to see Nine Inch Nails live in concert in San Antonio. And let me tell you, this concert was awesome. I hadn’t seen them live since ’95 when they toured with David Bowie, and I missed their last two concert tours due to ticket scalpers getting all remaining tickets and jacking up the price. Luckily for me, Nine Inch Nails allowed pre-sale offers to members of The Spiral, the Official Nine Inch Nails Fan Club (http://www.nin-thespiral.com/). This gives true fans an opportunity to get a chance to buy tickets before scalpers and take money out of their pockets.

Opening for Nine Inch Nails was Queens of the Stone Age, who would have been a great live show with the exception of the terrible job the sound engineer did. If the high end wasn’t cranked up so high, I might have actually been able to make out the vocals. This was kind of heart breaking for me since Queens of the Stone Age are one of my favorite bands and I was really looking forward to hearing them live. I’ve worked with plenty of sound engineers in the past whos ears were so calloused up from years of abuse they had a hard time hearing high end or low end sound correctly. Excusing the sound engineering, the bands live performance itself better than their studio performance in my opinion. They played much faster paced and definitely fed off the energy of the crowd. Their performance of “Go With the Flow” and “No One Knows” really got the crowd moving.

However the real highlight of the show was Nails. All of the songs they did live totally rocked. While their stage setup was not quite as elaborate as the one they used for the Fragile tour, I felt it was a better setup visually. The live sound was excellent, and the crowd was on their feet the entire show. Songs such as “Beside You in Time” and “Right Where is Belongs” that I thought would not work as well live far exceeded my expectations and ended up being some of the better performances. For almost two hours the band kept playing, so I have to give kudos for their endurance, especially since some of those songs really take a lot of energy to perform. This concert, by far, was better than their performance in ’95. While all the songs were definitely known songs (there really aren’t Nails songs that are unknown to Nails fans), I was surprised that they didn’t play “Starfu$#@ers INC”. I was really looking forward to hearing that live, maybe its because I remember a certain guest appearance during their show in NY Madison Square Garden.

Overall, if you are a fan of that genre of music, I do highly recommend seeing them live if you have the opportunity. I will actually be attending the show in Houston, and am looking forward to seeing them again so soon. I must be getting old, because this time around I think I will have earplugs.

Wednesday, October 12, 2005

BIRT Report Server Pt. 2

In my previous article entitled “BIRT Report Server Pt. 1”, I showed how I set up my base server for reporting with BIRT. In this article, I will continue by setting up the components needed to generate scheduled reports--specifically Apache Tomcat and the BIRT report viewer. For demonstration, I will use the report I built in my previous article: “Sguil Event reporting with BIRT”. The completed setup allows users to retrieve completed reports from the exposed Apache server, allow remote administration via SSH, allow only the development machine to have access to Samba and Swat, and deny outside access to the Apache Tomcat service that will be used local to the server to generate reports via the BIRT Java Servlet.

I need the following components before I begin: Apache Tomcat 4.1.30 and the Java Software Development Kit 1.4.2_90. The Java Runtime Environment alone is not enough since Tomcat required the SDK version. For my own purposes, I prefer binary packages rather than the source packages for two reasons: first is the headache of attempting to compile packages and issues involved with that, such as missing libraries; second is that it is easier to demonstrate using binary packages. Apache Tomcat 4.1.30 is available at http://archive.apache.org/dist/jakarta/tomcat-4/v4.1.30/src/jakarta-tomcat-4.1.30.tar.gz. Java SDK 1.4.2_09 is available at http://java.sun.com/j2se/1.4.2/download.html. I downloaded the RPM version of Java to make for an easier install. Both files were downloaded to the /usr/local/src directory. Since I already installed BIRT as indicated in my previous article “Sguil Event reporting with BIRT”, I already have the BIRT Java Servlet to install into Tomcat on my development machine. Also, I already have the report I will use for testing, SguilReport.rptdesign. For reference, the local machine is at IP address 10.10.2.131, and the development machine is at IP address 10.10.2.1.

Since Tomcat is dependent on Java, I need to install the Java SDK first. Even though this is an RPM based download, Sun provides this as a self-extracting executable to force you to go through the EULA. To launch the extracting binary file, I run the following command (Note: my working directory is /usr/local/src):

./j2sdk-1_4_2_09-linux-i586-rpm.bin

This brings up Sun’s EULA. I agree to the terms, which extracts the RPM package. To install the RPM package, I run the following command:

rpm –Uvh j2sdk-1_4_2_09-linux-i586.rpm

The Install goes though the RPM console progress meter, and I have no issues. Although it is not indicated anywhere during the install, the files are installed to the /usr/java/j2sdk1.4.2_09/ directory. I will need to set up an environment variable for Tomcat to find Java, called JAVA_HOME. To setup the environment variable I run the following command:

export JAVA_HOME=/usr/java/j2sdk1.4.2_09

Since I will be rebooting a few times during the installation and testing, I want to make this a global environment variable available on bootup, so I need to add the entry to the /etc/profile file. To add this to /etc/profile I run the following command:

echo “export JAVA_HOME=/usr/java/j2sdk1.4.2_09” >> /etc/profile

Note the use of the >> redirect symbol. This will cause the redirect to append to the end of the file instead of overwriting the contents of the file. Now I am ready to extract Tomcat. From the /usr/local/src directory I run the following command:

tar –zxvf jakarta-tomcat-4.1.30.tar.gz

This is the full package, and I don’t want it to reside in my /usr/local/src directory. I decide the best place for it would be in the /usr/local folder, so I need to move it. I move the extracted directory to reside in the /usr/local directory like so:

mv /usr/local/jakarta-tomcat-4.1.30 /usr/local

Much like the Java setup above, I need an environment variable for Tomcat called CATALINA_HOME. I set up an environment variable to test run Tomcat by running the following command:

export CATALINA_HOME=/usr/local/jakarta-tomcat-4.1.30/bin

Now I need to add the CATALINA_HOME variable to the /etc/profile for future bootups:

echo “export CATALINA_HOME=/usr/local/jakarta-tomcat-4.1.30/bin” >> /etc/profile

Since Tomcat now resides in its permanent home and I have set up my environment variables, I am ready to do a test run to ensure that everything is set up correctly. Tomcat has a nice startup and shutdown script included with it to make it that much easier to run. So to start Tomcat I run the following command:

$CATALINA_HOME/bin/startup.sh

In order to test if Tomcat is running I want to connect from my development machine using a graphical browser, so I need to shutdown IPTables. To do so I run the following command:

/etc/init.d/iptables stop

Now I go to my development instance and open up Internet Explorer to port 8080 on my reports server at 10.10.2.131. I can see by the Tomcat home page that it is running:


Looks like Tomcat is running. I also go into the Examples Links and decided to see if the servlets are running correctly. Below is the Hello World Servelet:


Now we need to get the BIRT applet over to the report server. To accomplish this, I copy from the BIRT installation directory to the report servers webapps directory. I installed BIRT on my development Windows machine at C:\Program Files\ActuateBIRT1.0.1\BRD. The Birt Report Java Applet resides in $BRD_INSTALL_DIR\eclipse\plugins\ org.eclipse.birt.report.viewer_1.0.1\birt. On the server the target directory will be /usr/local/jakarta-tomcat-4.1.30/webapps. Since SSH is installed on my Windows machine via Cygwin for Windows, I copy the files using SCP. Since I am using Cygwin, I will need to replace the C:\ prefix of my directory structure with /cygdrive/c and replace all the \ characters with / characters in my Windows path. Below is the transcript of the commands run to copy this over:

scp -r "/cygdrive/c/Program Files/ActuateBIRT1.0.1/BRD/eclipse/plugins/org.eclipse.birt.report.viewer_1.0.1/birt" root@10.10.2.131:/usr/local/jakarta-tomcat-4.1.30/webapps

Now a bunch of files scroll by. I need to restart Tomcat in order for the changes to take effect, so I run the following commands from the reports server:

$CATALINA_HOME/bin/shutdown.sh
$CATALINA_HOME/bin/startup.sh

Now I need to reconnect to the Tomcat server and log in to the Management Applet to verify my change that the Birt report viewer is installed correctly. On my development box, I connect to the server in Internet Explorer. To check this, I need to go into the Tomcat Manager applet. The manager applet will not allow access to anyone who does not have the manager role assigned to them. So first I will need to create a user in Tomcat and assign them the manager role. The Tomcat users file is located at $CATALINA_HOME/conf/tomecat-user.xml. I modify it like so:

<?xml version='1.0' encoding='utf-8'?>

     <tomcat-users>
          <role rolename="tomcat"/>
          <role rolename="role1"/>
          <role rolename="manager"/>
          <user username="tomcat" password="tomcat" roles="tomcat"/>
          <user username="jward" password="jward" roles="manager"/>
          <user username="both" password="tomcat" roles="tomcat,role1"/>
          <user username="role1" password="tomcat" roles="role1"/>
     </tomcat-users>


Once I restart Tomcat I should be able to access the manager applet as jward. I get into the management window, and I can see that the BIRT report viewer is indeed setup correctly.


To complete the set up of BIRT I need to make the reports viewer aware of the path to the reports folder. Recall from the last article that we created a separate partition called /birt_reports to house reports. To make BIRT aware of this, an entry is added to the $CATALINA_HOME/webapps/birt/WEB-INF/web.xml file. I need to change the following tag to look like this:

<context-param>
     <param-name>BIRT_VIEWER_REPORT_ROOT</param-name>
     <param-value>/birt_reports</param-value>
</context-param>

After this is set up, I want to run a report and test it. We will use the SguilReport.rptdesign that was created previously. To make the server Birt Report Viewer aware of this report, I only need to copy it over to the E: drive share I have on my development box:

C:\Program Files\ActuateBIRT1.0.1\BRD\eclipse\workspace>copy SguilReport.rptdesi
gn e:
1 file(s) copied

Now that the file is copied I need to test run it using the following URL:

http://10.10.2.131:8080/birt/run?__report=SguilReport.rptdesign

The report result looks like below:


Now that the report runs successfully from Tomcat, I would like to set up an automated task with Cron to run the report and retrieve the results. I would like the scheduled report to run weekly, and put the output file in the Apache root web folder for report viewing, with the report name and date the report was run appended to the end. The easiest way to do this is to use Wget in a script and schedule it to retrieve the report. To do this, I will set up a script file in the /etc/cron.weekly directory. My Apache web root directoy is at /var/www/html. To test if this will work I run the following command:

wget http://localhost:8080/birt/run?__report=SguilReport.rptdesign -O /var/www/html/sguil_report_`date +%G-%m-%d`.html

After this is done, I go into my development machine, and try to retrieve the generated report via Internet Explorer. I will access it from the following URL

http://10.10.2.131/sguil_report_2005-10-04.html


I can schedule the job with Cron now that I know my command will work. This will allow the scheduled jobs to run without any intervention from me, and be able to retrieve them from the publicly exposed Apache instance pre-generated. To add this to my weekly Cron schedule I am going to run the following commands:

echo wget http://localhost:8080/birt/run?__report=SguilReport.rptdesign -O /var/www/html/sguil_report_\`date +%G-%m-%d\`.html > /etc/cron.weekly/run-sguil-report
Chmod 755 /etc/cron.weekly/run-sguil-report

Now that this is scheduled, I do not want Tomcat to run as my root user. Instead it should run as the birt_rpt user. I need to make sure the birt_rpt user can access the Tomcat folders, so I will need to change the owner and group of the /usr/local/jakarta folder to birt_rpt. I have already done this for the /birt_report folder. I run the following two commands to recursively change all files and folders for Tomcat to be owned by birt_rpt:

chown –R birt_rpt /usr/local/jakarta
chgrp –R birt_rpt /usr/local/jakarta

Tomcat has to be set up to start automatically on boot as the birt_rpt user. I would like to be able to utilize a SysV style script at startup. I will need an appropriate file in /etc/init.d for Tomcat, and set the process to start correctly in Runlevel 3. After much searching, I came across this article http://gridrm.org/admin/auto-start-tomcat.html that fully explains how to set up Tomcat to start on boot as another user. I had some issues with setting this up, so I was glad to find a article describing how to do this correctly. I tried many different approaches, such as loading in rc.local, and other formats for my init.d script;all of them had issues with context renaming in SELinux. I create a file called /etc/init.d/tomcat with the following contents:

#!/bin/bash
# chkconfig: - 85 15
# description: Tomcat is a servlet container

export JAVA_HOME=/usr/java/j2sdk1.4.2_09/
export CATALINA_HOME=/usr/local/jakarta-tomcat-4.1.30/

start_tomcat=$CATALINA_HOME/bin/startup.sh
stop_tomcat=$CATALINA_HOME/bin/shutdown.sh

start() {
     echo -n "Starting tomcat: "
     su -c ${start_tomcat} - birt_rpt
     echo "done."
}
stop() {
     echo -n "Shutting down tomcat: "
     ${stop_tomcat}
     echo "done."
}

#see how we were called
case "$1" in
start)
     start
     ;;
stop)
     stop
     ;;
restart)
     stop
     sleep 10
     start
     ;;
*)
     echo "Usage: $0 {startstoprestart}"
esac

exit 0

Note the format of su in the start function. For some odd reason SELinux was very particular about this format for su, and threw various errors when this script was run otherwise. Next the permissions of /etc/init.d/tomcat script are modified by running:

chmod 755 /etc/init.d/tomcat

Then I set it up to run in Runlevel 3 using the following command:

chkconfig --level 3 tomcat on

And the final piece of the puzzle is more optional than anything. I decide I want to create a small PHP file that will reside in the /var/www/html directory that will list the contents of that folder to show the report files. Although this script could be cleaned up quite a bit to correct formatting and remove the . directory, the .. directory, the script name itself, and pretty it up, I kept this bare bones for the purpose of this example. The script will basically get a listing of all files in the /var/www/html directory, store in an array, then go through each element in the array and display the file name with an hyperlink to it. (Note: Comments are removed for brevity):

<html>
<body>
<?php

     $my_directory="/var/www/html/";
     $dir = dir($my_directory);

     while ($temp = $dir->read())
          $dirarray[] = $temp;


     for ($x = 0; $x <= count($dirarray); $x++)
          echo '<a href="'.$dirarray[$x].'">'.$dirarray[$x].'</a><br>';
?>
</body>
</html>


The results fo the script are below:

While this is a very basic example, it demonstrates how to set up a full-fledged automated reports server. Although I used the Sguil report environment as my example, it can be set up to report on any database application in your environment. With customization, this setup can be every bit as robust as the commercial offerings out there. It is easy to administer since it uses easily accessible and standard utilities, and makes use of the facilities that the Operating System already offers. Outside of the optional script to display the contents of the Apaches root directory, there was no custom development required. Every single part of this system does one thing and does it very well.