A lot of people like the modified PSP because of the homebrew emulators out there, allowing your old favote NES, SNES, Sega Genesis, and a while slew of other platforms to be played portably on the PSP on the go. Its sort of like what I thought the Nintendo Gameboy was going to be when I was a little kid. Well, the homebrew scene has known this since December of '06, but PSOne games can be played on the PSP, a capability not provided by the awesome and dedicated homebrew hackers out there, but by Sony themselves. Seems this was done in order to bolster cooperation and sales between the PS3 and the PSP. Homebrew guys just figured out the nitty gritty in getting this to work with all PSOne games, not just the ones provided by the PS3.
Now, I spent the better part of the night trying to figure out how to copy my PSOne games in a format that could be converted and played real easily. With the 3.X OE firmwares is a utility called Popstation that allows for the conversion of ISO's to a PSP friendly playable format. Of course, the documentation isn't very well done, and I just about pulled my hair out. The homebrew scene provides dozens of frontends, none of which really did what I wanted. However, thanks to the gaming news site QJ.Net , I was clued in to a neat little utility called Autopopstation. Basically, it is a collection of tools for creating PSP capable games. There is ISO Product, a tool that creates ISO images of PSOne games using the excellent Petes CD-R plugins (which incidently are the same plug ins used in PS emulators such as ePSXe), and the Autostation4.bat file, which is a batch file that automates the entire task of naming images, getting the game identifier tags, and compressing the games, and creating the PSP images. Just copy the completed images over to the PSP/Games folder and your set.
Thursday, May 31, 2007
Games: PSP Firemware 3.40 OE-A Upgrade
So I took the time this morning to update from PSP Firmware 3.04 OE-C to 3.40 OE-A. This was actually a much easier process than doing the initial downgrade since I didn't need to run any sort of exploits to do so. Just copy the files into the firmware maker folder, run it from the PSP, then run the firmware writer, and I'm done. Follow the directions from the README, they couldn't be simpler.
Wednesday, May 30, 2007
Games: Hacked my PSP
I had written before about using a not so permanent hack on the PSP to allow for homebrew gaming. Well, considering that my PSP has been collecting dust since I bought Metal Gear Solid: Portable Ops (which was definitely a worth while game, probably the only one for the PSP), which upgraded my firmware to a not so homebrew friendly version, I decided to make the hack more permanent to make the dang thing useful again.
I will give you fair warning. If you value your PSP, are or are not technical, do not attempt this. You run a serious chance of ruining your PSP, that is you can make it a 200 dollar paperweight. I am not an expert on the PSP, so if you ruin it, don't ask me how to fix it.
I wont provide a step by step tutorial on how to do this since the below links do a fine job at describing the task at hand. A few things are required before you can attempt this. You will need:
1. A Sony PSP
2. A older copy of Grand Theft Auto, Liberty City Stories
3. A USB connection
4. A whole lot of guts.
Follow the directions on this page to get to firmware version 1.5.
Next, follow download and follow the direction in the readme to update to 3.03 OE-C.
While its still not as cool as my Nintendo DS, it is nice to be able to play Chess on the go, and export my games to PGN and download to my PC with no effort. If I get really bored, I can always try my hand at writing some apps for it. It’s a shame really, homebrew makes the PSP actually an interesting device, yet Sony is so hostile towards the homebrew community.
Games: Guitar Hero on your PC
I mentioned previously my love of Guitar Hero 2. Well, totally forgetting that since the wired controller is essentially an Xbox 360 controller, and the fact that Windows XP automatically recognizes said controllers, it never occurred to me that I could plus in the guitar to my PC, until I read this article explaining that the 360s guitar controller could be used with the open source clone of Guitar Hero, called Frets on Fire. It also comes with a built in Guitar Hero Song ripper that will take the song right off the Guitar Hero DVD (I am assuming it is the PS2 version since this feature did not work with the 360 version). This is great since I travel a lot, so now I can practice and keep up with my fiancée, who just happens to be better than me at it. Lets hope that Red Octane doesn’t get a wild hare in the you know where about this and decide to cry DMCA or some crap. As a legitimate owner of Guitar Hero, its nice to be able to play on the go.
Thursday, May 10, 2007
Windows: Quick Start Multiple Services using Batch and Net
One thing that irritates the hell out of me as a developer is that I constantly have to change configurations between development, BAU, and leisure on my PC. I keep all my development and test environments in separate virtual machines using VMWare so I can hose them and restore them, use these as test beds for new application without worrying about cluttering up my registry, and for browsing to some of the more "questionable" sites on the web without fear of corrupting my host machine. This allows me to keep the amount of garbage on my host environment down to a minimum. This also means I do not run all my services at startup, allowing for speedier work on my host PC and faster boot times, and less exposed services running.
The irritating part is that VMWare has a lot of services associated with it. So when i want to play a game, which I will typically do on my host rather than a VM for performance reasons, I have to shut down all 5 of the services that are associated with it. Under my database development VM, I have to start and stop all services associated with Sql server when I want to use it, or with MySql. Under the web development VM, I have to start and stop IIS or Apache depending on which platform I am testing (I keep all these under logical groupings rather than keep separate VM's for each). Having to point and click to start services is a PITA.
However, a quick solution is a trick that is old hand to many administrators and old DOS guys. I use seperate batch files to quickly start and stop the multiple services associated with an application. For example, on my host PC, I have 2 batch files for VMWare, one to start and one to stop. In order to start and stop services, I use the built in NET command. The file to start my services looks like this:
@echo off
net start "VMware Authorization Service"
net start "VMware Registration Service"
net start "VMware DHCP Service"
net start "VMware NAT Service"
net start "VMware Virtual Mount Manager Extended"
And the script to stop them looks like:
@echo off
net stop "VMware Registration Service"
net stop "VMware Authorization Service"
net stop "VMware DHCP Service"
net stop "VMware NAT Service"
net stop "VMware Virtual Mount Manager Extended"
While not exactly cutting edge, it is a quick tip that saves me a lot off waiting time. Of course if you run into the issue with the Registration Service not starting in a timely manner, I wrote an article several months back on how to fix that here.
Sunday, May 06, 2007
BIRT: Resort Columns After Report Has Been Run
BIRT strong suit is in the realm of online reporting. One of the features that is common with online applications that display information in a grid format is the ability to click on a column header and have the information resort based on that column. In this article I will show you how to do just that with BIRT.
The report that we will do this on is a report that lists customers and their payment information. It will be based off of the Classic Cars databases. These instructions are for BIRT 2.2 and will not work on previous versions.
1. Create a new report in an BIRT reporting project. Call this new report “customerPayment.rptdesign”.
2. Create a new Data Source from the Classic Cars Inc. Sample Database.
3. Create a new dataset using the following query:
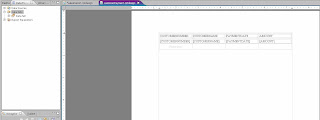
Figure 1. Report will Look Like after step 4
5. Create a new report parameter called rptprmSortOrder. Set it to allow null values and hidden.
6. Add the following script to the OnPrepare event of the table.
7. In the header row, we need to create hyperlinks that will call this report, and pass in parameters to tell which column to sort by. So save the report as it is, othehrwise the parameters will not show up in the drill down dialog. Select the PaymentDate column header, and create a hyperlink like so:
With that done, now you can reorder the report in view time when the user clicks on the date or the amount columns. With a little more logic developed in you can have the report do both ascending and descending sorts, and even have it refresh the report without having to refresh the viewing page.
The report that we will do this on is a report that lists customers and their payment information. It will be based off of the Classic Cars databases. These instructions are for BIRT 2.2 and will not work on previous versions.
1. Create a new report in an BIRT reporting project. Call this new report “customerPayment.rptdesign”.
2. Create a new Data Source from the Classic Cars Inc. Sample Database.
3. Create a new dataset using the following query:
select
 *
from
 CUSTOMERS,
 PAYMENTS
where
 CUSTOMERS.CUSTOMERNUMBER = PAYMENTS.CUSTOMERNUMBER
and customers.customernumber = ?
- a. Name the parameter dsprmCustomerID
- b. Under the dialog for the data set parameter, create and link to a report parameter called rptprmCustomerID. Set it as a text box entry.
- a. Customer Number
- b. Customer Name
- c. Payment Date
- d. Amount

Figure 1. Report will Look Like after step 4
5. Create a new report parameter called rptprmSortOrder. Set it to allow null values and hidden.
6. Add the following script to the OnPrepare event of the table.
//We only want to add this into our code when the value is not null for the
//parameter sort
if ( params["paramSortOrder"].value != null )
{
 //Bring in the BIRT Report Model API and for CONSTANTS
 importPackage( Packages.org.eclipse.birt.report.engine.api.script.element );

 //Create a dynamic sort condition
 var sortCondition = StructureScriptAPIFactory.createSortCondition();

 //Based on the value of the sort parameter, set the appropriate key value for sorting
 switch (params["paramSortOrder"].value)
 {
     //Remember that for the key, we need to use the fully qualified row and field name as a string, not as a value
     case "date" :
         sortCondition.setKey("row[\"PAYMENTDATE\"]");
         break;
     case "price" :
         sortCondition.setKey("row[\"AMOUNT\"]");
         break;
 }

 //set condition to ascending order
 sortCondition.setDirection("asc");

 //Add to the table
 this.addSortCondition(sortCondition);
}
7. In the header row, we need to create hyperlinks that will call this report, and pass in parameters to tell which column to sort by. So save the report as it is, othehrwise the parameters will not show up in the drill down dialog. Select the PaymentDate column header, and create a hyperlink like so:
- a. Select drill down
- b. Link to the customerPayment.rptdesign file
- c. Select the rptprmCustomerID field, and set the value to params["rptprmCustomerID"]
- d. Select the rptprmSortOrder parameter, and set the value to “date” with the quotation marks.
- e. Set to open in the same window.
- 8. Do the same thing for the Amount column, except set the value of rptprmSortorder to “price”.
With that done, now you can reorder the report in view time when the user clicks on the date or the amount columns. With a little more logic developed in you can have the report do both ascending and descending sorts, and even have it refresh the report without having to refresh the viewing page.
Subscribe to:
Comments (Atom)

