First, I open up the Eclipse IDE. I switch over to the BIRT perspective by going up to Window/Open Perspective/Report Design. I create a new BIRT project, and call it CheckBoxParameterReport. Once this project is created, I go to the Project Explorer, right mouse click, and select New Report. I call this new report CheckBoxReport.rptdesign. I create this as a Blank Report.
Once the newly created report is open in the designer, I open up the Data Explorer tab. Under this tab, I right-mouse click on the Report Parameters section, and selet Report Parameter. In the report parameter dialog, I fill in the values as outlined in Figure 1. Be sure to change the type to Boolean, otherwise the correct prompt types will not be displayed.
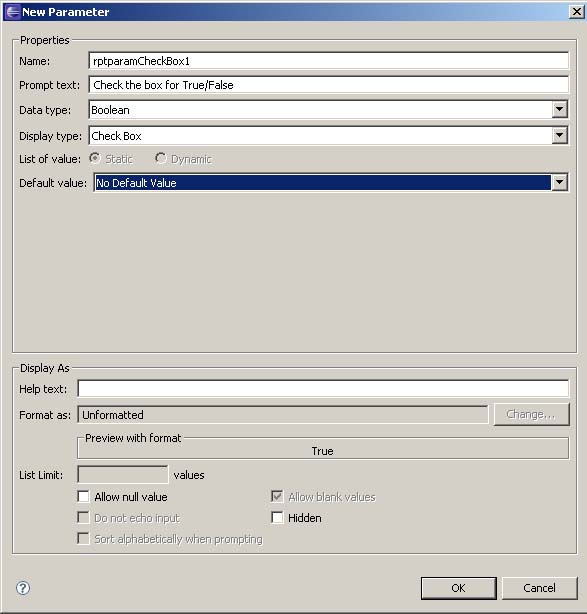
Figure 1. Report Parameter Dialog
Once filled in, I hit OK, drag the parameter over to the design window. I save the document, go over to the project Navigator, then right-mouse click the report design, and choose Report/Run. I then get greeted with the Parameter Dialog with my check box, once I click my value and hit OK, I get the report showing my selected value.

Figure 2. My Dialog Box


1 comment:
what u are saying is evident.
but how to make a relation between the report values and the parameter?????
Post a Comment