There are a few pre-requisites that needed to be addressed before I could start. First issue that we came up against was a licensing issue. The license that we had been issued for our cluster had the incorrect number of CPU’s and incorrect options enabled. Licenses work on a per CPU basis, and the license that we needed to have needed to accommodate the total number of CPU’s in the cluster across all machines and have the appropriate options for load balancing (eSpreadsheet, Analytics, Actuate Query, etc). Fortunately, Actuate support was very accommodating and their turn around in getting this matter resolved was resoundingly fast. This is one of the reasons I always hold Actuates support group up as a model that other companies should mimic.
Before beginning the actual cluster setup, be sure to backup the entire configuration files under the “<Actuate Root>\Iserver\etc” folder. As I found out, once you start the process, it is very easy to break and very difficult to recover from unless you have these backups.
Setting up the cluster is laid out pretty straight forward in the Actuate manuals. There is one prerequisite, however, that I could not find mentioned, and that is that you must set up file shares for the partitions that are to be clustered. For the clustering to work, all nodes in the cluster need access to the partitions for the volumes they will load balance or fail-over for. To Actuates benefit, you can use UNC names rather than actually having to map a drive letter for the partitions, so you will only need to create the shares for later use. I illustrate this later.
First step is to log into the Actuate management console as an administrator. Once you are logged in, click on the button labeled “Create Cluster”. In my screenshot below, the button is grayed out, but that is because I already clicked on this. As far as the screen that follows, I just kept all options default.
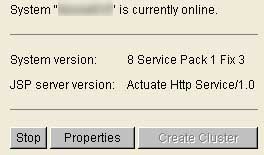
Figure 1. Create Cluster Button
Next, I click on the servers tab on the right hand side, bringing up my list of servers. If I had not clicked on “Create Cluster”, the “Add Server” button on this page would be grayed out. Before I proceed, I make sure my slave machines Actuate process is stopped from within the Actuate Management Console; otherwise Actuate will not allow it to be added.
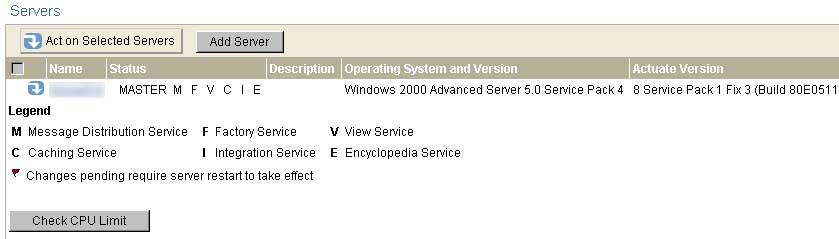
Figure 2. Servers Menu
For the Server options, I added the DNS name of my server into the Hostname or daemon IP address with a port of 8100. For the server IP address, I used the DNS name of the cluster master, and set the Application container process listener port to 8900. I checked all boxes for services except message distribution. Once completed, I clicked on the partitions tab, and entered the partition information for each of the shares to be clustered.

Figure 3. Server Settings

Figure 4. Partitions
Once I click on Apply, the remaining fields will fill in automatically. It is at this point that I enable the message distribution service, go into the Message Distribution tab, and enter the cluster master as the server address.
Once I hit OK, I get back to the Servers tab. I can see my newly added slave system sitting there. I try to start it up, but I get an error about not being able to bind to a server IP address. Turns out, I entered the wrong address for server IP address. I click on properties, and change this to the slave systems DNS name. Once complete, I go back to the servers tab, and see my red flag again. I click on start-up and the server is now online.

Figure 5. Servers with new Cluster Node
However, I can see that the message distribution service is still not running. When I go to enable it, I get the same error message about failing to start with an invalid SOAP IP. So I shut the slave server down, go back into the message distribution service tab, and enter the slave systems DNS name. Then I go back to general properties and click on enable for the message distribution service. I click on Apply, OK, and restart the slave server. Now it is online with the message distribution service. I am not sure if that is correct, but it started, so that is definitely a step in the right direction.
Once the server is online, I also set the new cluster server as the fail-over system for all the Actuate volumes. Now my cluster is complete. I verify this by going into the System Resource Group tab, and verifying that the appropriate numbers of factories are assigned to both servers.

Figure 6. System Resource Assignment


2 comments:
good info
That is good info on the setup.
Now how would you test that the cluster is performing at its best?
Post a Comment