The Avia DVD is probably one of the easiest tools I have used for this purpose. I have tried other calibration DVD’s, however they only provide the patterns. Avia separates itself from these by actually walking your through, step by step, how to calibrate you audio and video setups.
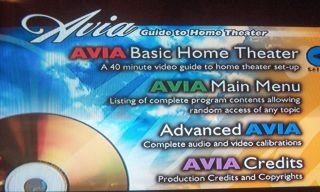
Figure 1. Avia Main Menu
When you go through the Wizard, the first adjustment is the White Level Adjustment (Brightness). The way this adjustment works, you adjust the brightness control until the lines on the side no longer “bow” out. When the lines bow out, the guns are turned too high and you get picture distortion from bright images.

Figure 2. White Level Adjustment
Next, you adjust the contrast, or black level. The way this works is you adjust the picture for a “blacker than black” scenario, where the dark areas of the image should be dark. The test pattern itself has two slightly lighter than black lines dance across the screen on the black portion. You adjust the image so that the leftmost line is not visible, or barely visible, and the right line is a little more visible. The key to this adjustment is to set the lights in the viewing room to normal viewing levels. I deviate from this slightly, since I watch TV in the dark. So I adjust the image with the lights on.
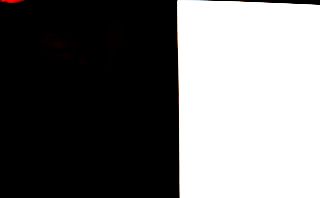
Figure 3. Black Level Adjustment
Next is the sharpness adjustment. The trick to this adjustment is to look at the white space between the center cross. If there is a “ghost” image of the lines, almost forming a series of gray squares, and ghost lines following the vertical and horizontal lines, then the sharpness is too high. Adjust the image to the point where the ghost disappears. It also helps if the color controls (Tint and Color) are turned down or off.
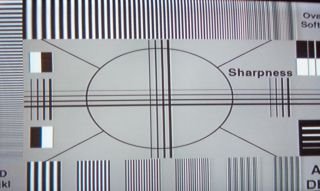
Figure 4. Sharpness Control
Now you can adjust the color controls, probably the 2nd most overlooked controls next to the brightness and contrast controls. These should be familiar since color bars used to be broadcast for off air channels. The idea is to adjust the image with the red and green filtered out (Avia comes with color filters to put over your eyes while you do this), or if you are using a video projector, turn off the red and green guns. When Color and Tint are adjust properly, the image should form solid blue lines, and the center blinking spots should be barely noticeable.
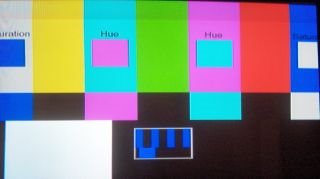
Figure 5. SMPTE Color Bars
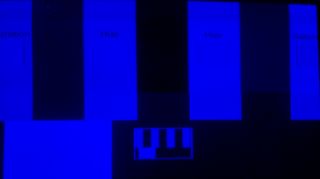
Figure 6. SMPTE with filters.
There are also Audio test tones for calibrating Surround Sound levels. These are meant to be adjusted with a sound meter (I use an old Radio Shack Sound Meter. The Model I use is discontinued, but they appear to have a newer model here. Analog is better here due to response time on the meters).
Alternatively, there are test patterns on certain THX DVD’s, but I don’t like these as much as the Avia DVD since to me the picture quality seems a little off for normal circumstances.


3 comments:
So the Avia is to the visual purist what the exotic cables are to a sound purist? :-)
In other related news to end the year: :-)
Incredible, that CNet's Most
Popular and ConsumerSearch.com agree on two home theater choices (I struggle to believe they cant be
possibly swapping notes), the pHilips HTS3555 selling at $189 to $250, and the $337 to $599 Panasonic SC-PT750.
Both have an integrated DVD player.
What better way to buy them than at eBay prices?www.e-dvdandhometheaters.com
The Avia DVD is probably one of the easiest tools I have used for this purpose. I have tried other calibration DVD’s, however they only provide the patterns. Avia separates itself from these by actually walking your thr
The key to this adjustment is to set the lights in the viewing room to normal viewing levels. I deviate from this slightly, since I watch TV in the dark. So I adjust the image with the lights on.
Post a Comment